Create a Cluster
Create a cluster so that you can store and access data in Couchbase Cloud.
Prerequisites
To create a cluster:
-
You need to have created a project in which to deploy your cluster.
-
You must have either
Organization Editprivileges, orProject Editprivileges for the project in which you are creating the cluster.
Procedure
-
Go to the project in which you want to deploy your cluster.
-
Go to the Projects tab.
-
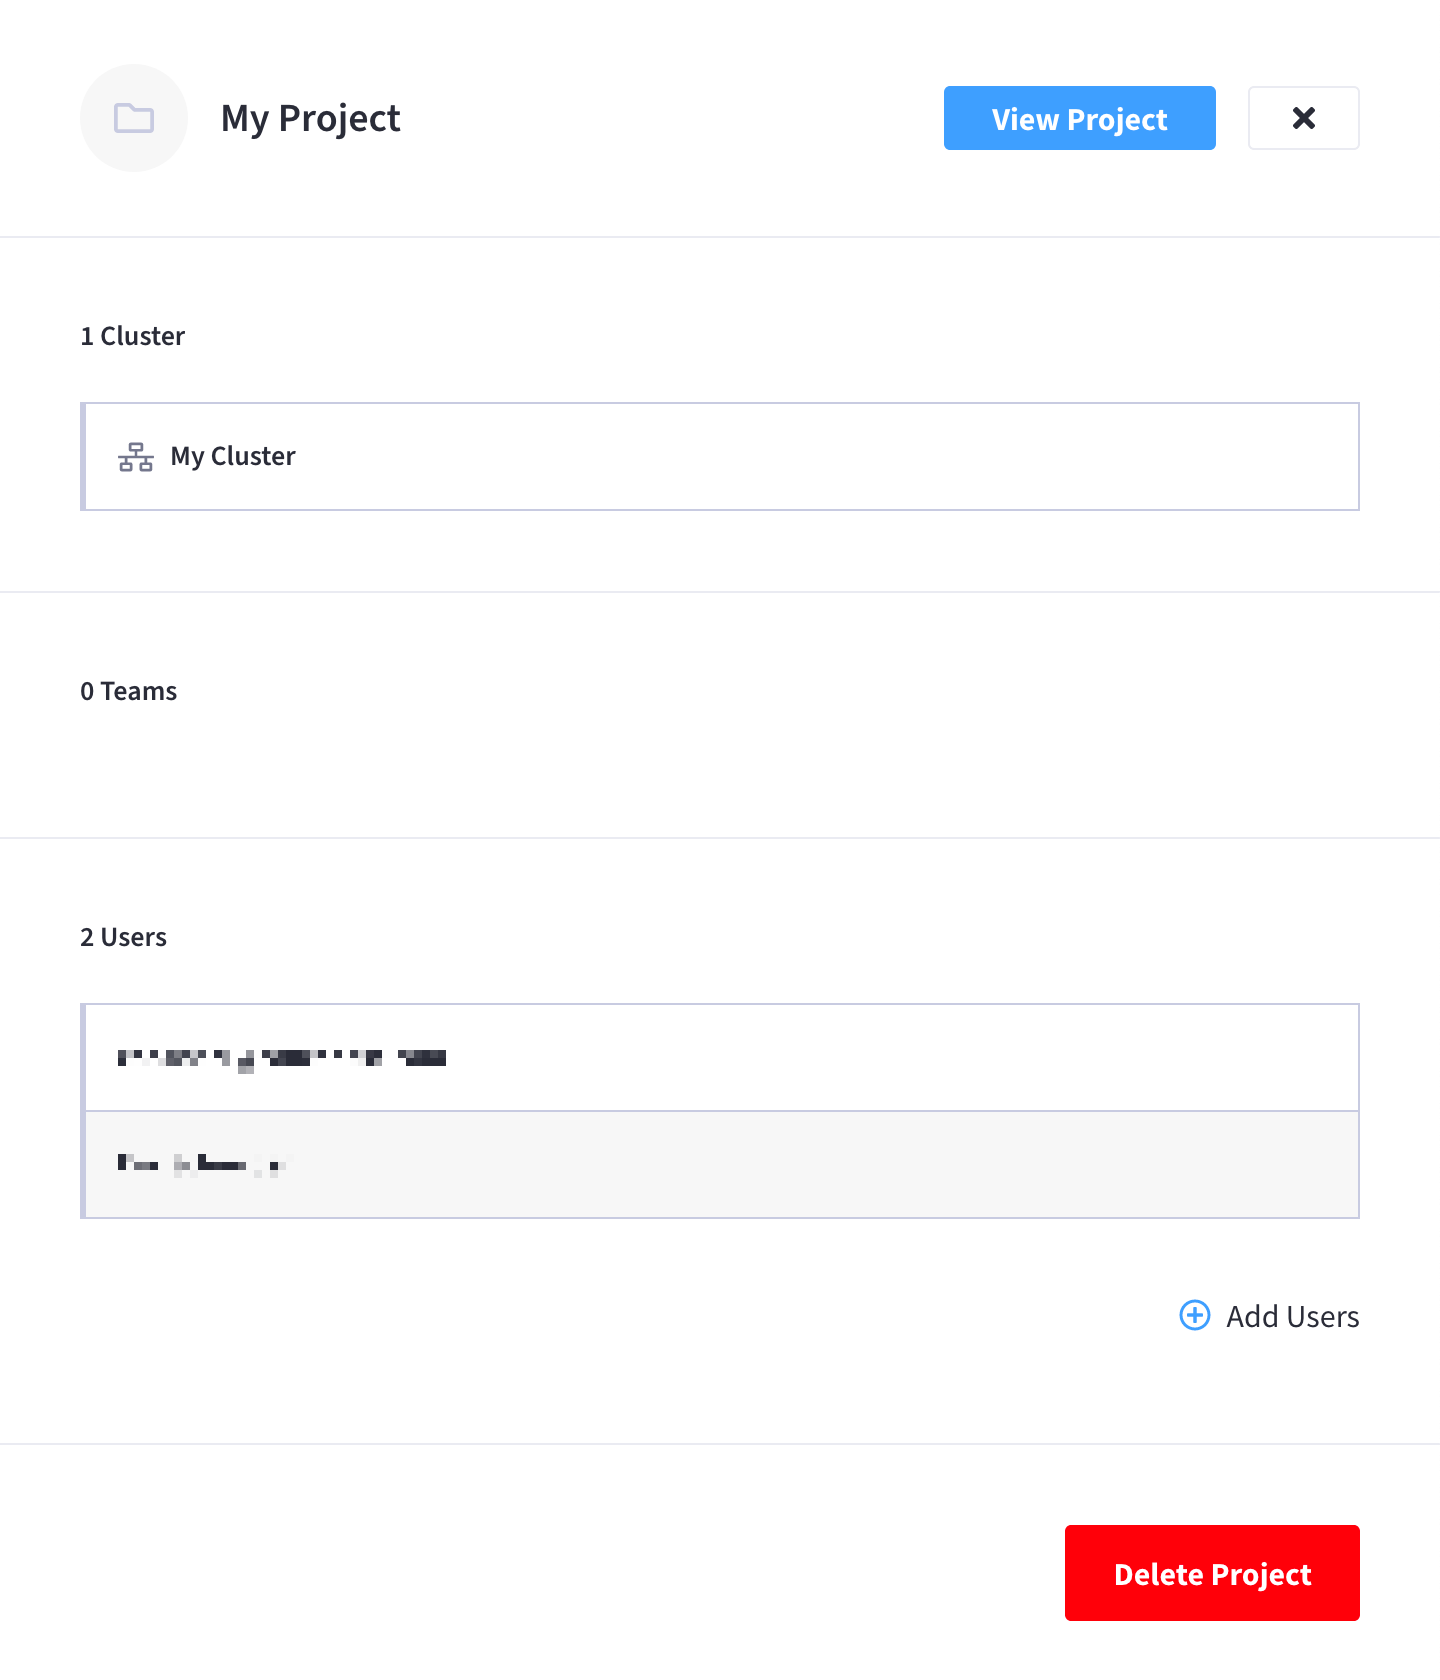
Find the project in which you want to deploy your cluster, and click on its name.
This opens the project’s slide-out menu:
-
At the top of the project’s slide-out menu, click View Project.

-
-
From the project’s summary screen, click Create Cluster.

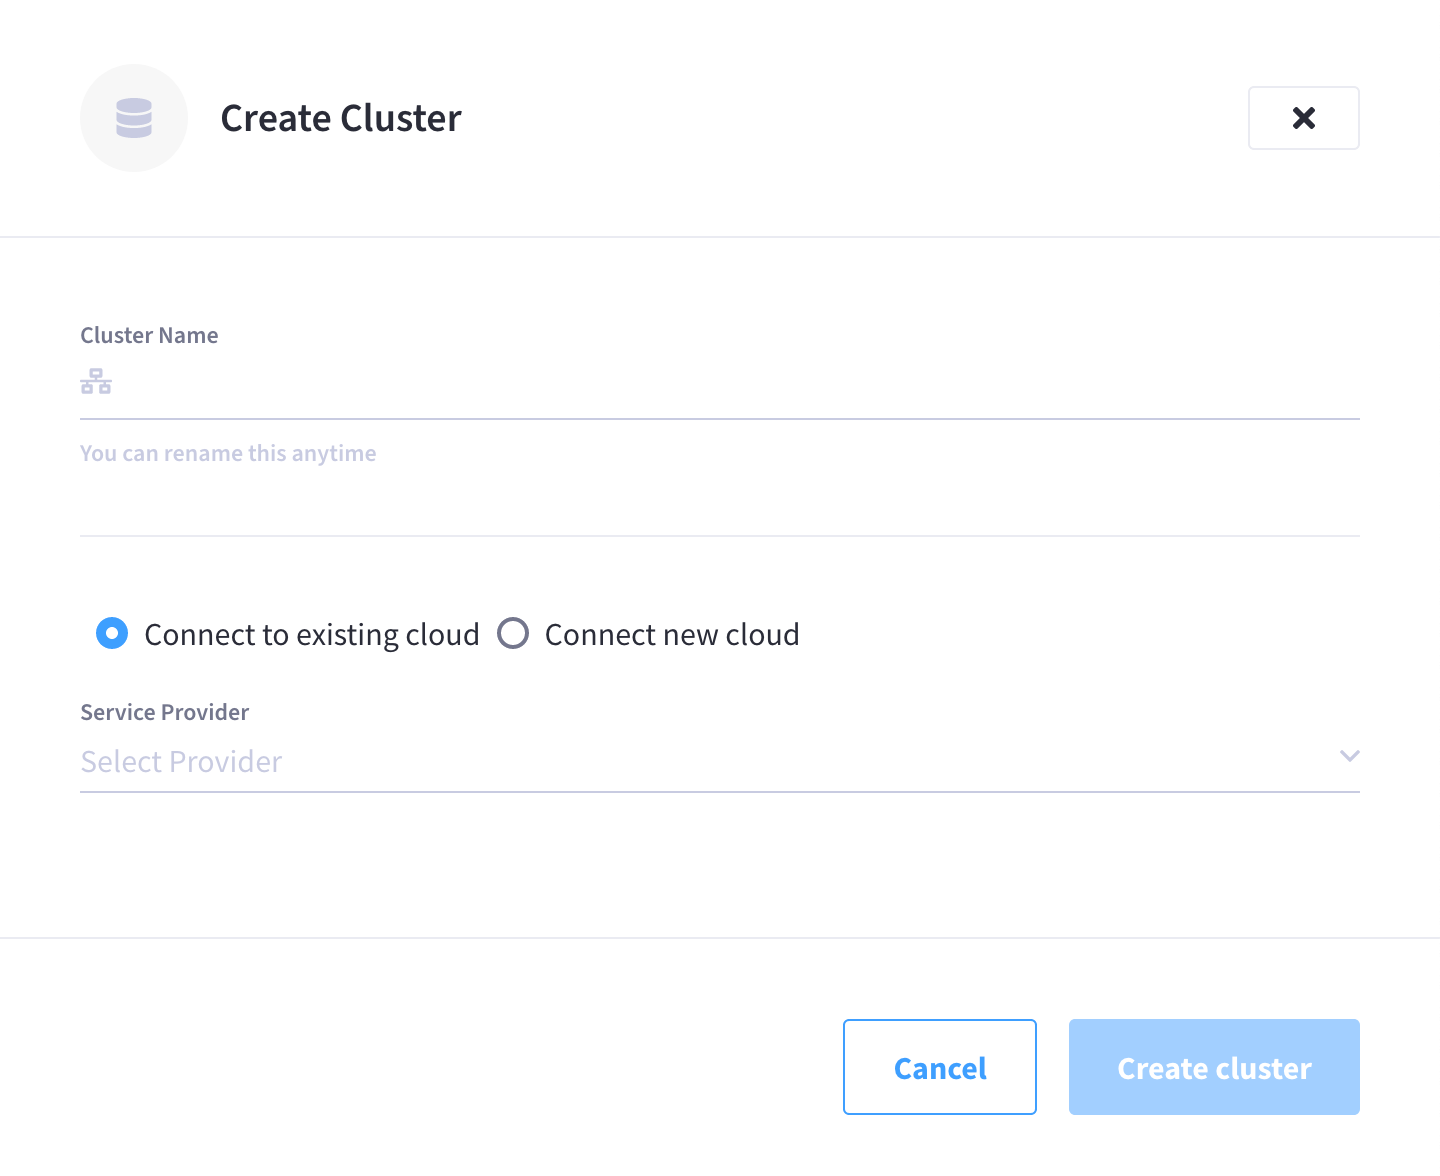
This opens the Create Cluster slide-out menu:
-
Enter a name for the cluster.
Note that this isn’t the cluster’s hostname, and can be changed later.
-
Specify a connected cloud for the cluster to be deployed on.
There are two options for specifying a connected cloud for your cluster. Use the radio buttons to choose one of the following options:
- Connect to existing cloud
-
Use the Service Provider drop-down menu to select an existing connected cloud.

- Connect new cloud
-
Enter details to configure a new connected cloud to deploy your cluster on.
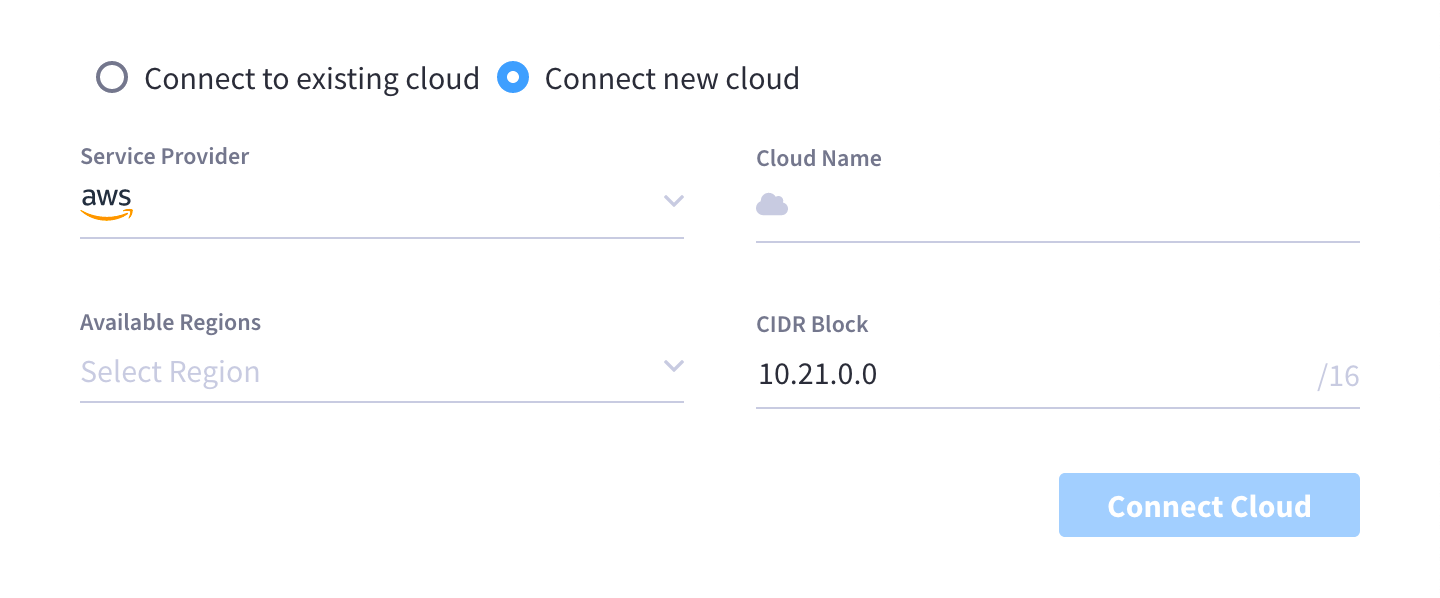
For detailed information on configuring a new connected cloud, refer to Manage Clouds.
-
Once you’ve given the cluster a name and specified a connected cloud, click Create cluster.
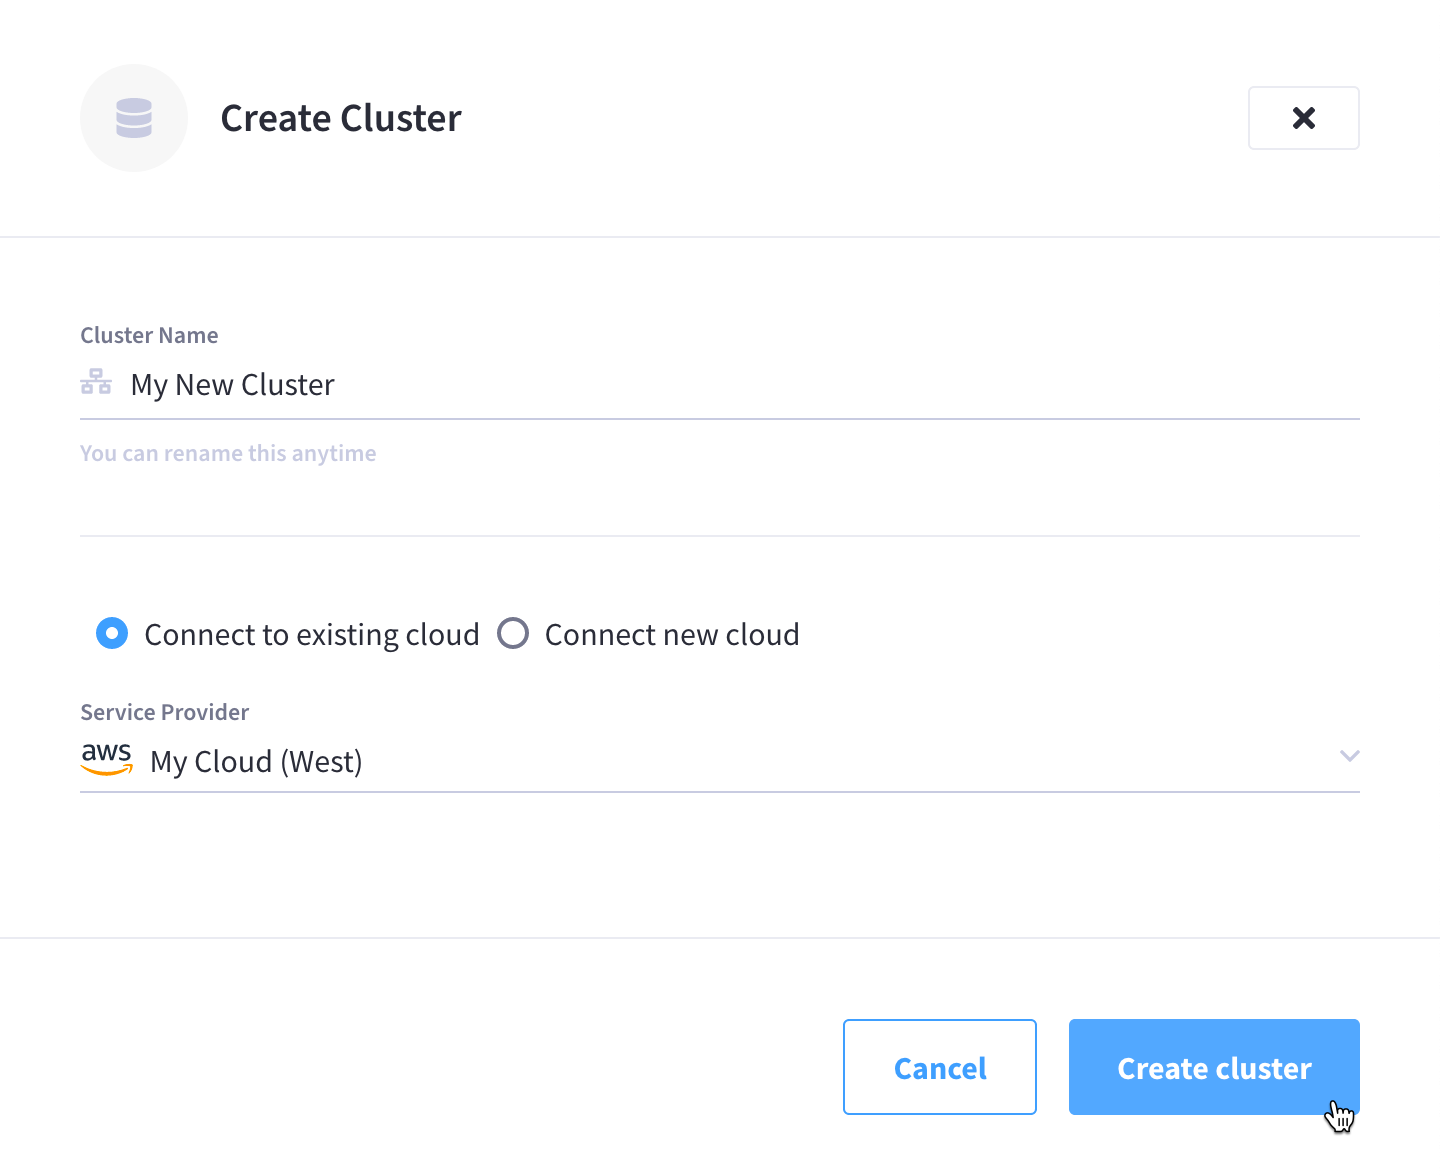
After completing this step, the cluster is saved within the project in a draft state. Draft clusters appear alongside all other clusters within the project, and you can return to them at any time. All continued changes to a draft cluster will continue to be saved until it is deployed.
If you need to abandon a draft cluster, you can delete it just as you would any other deployed cluster.
-
Set the cluster size and configuration.
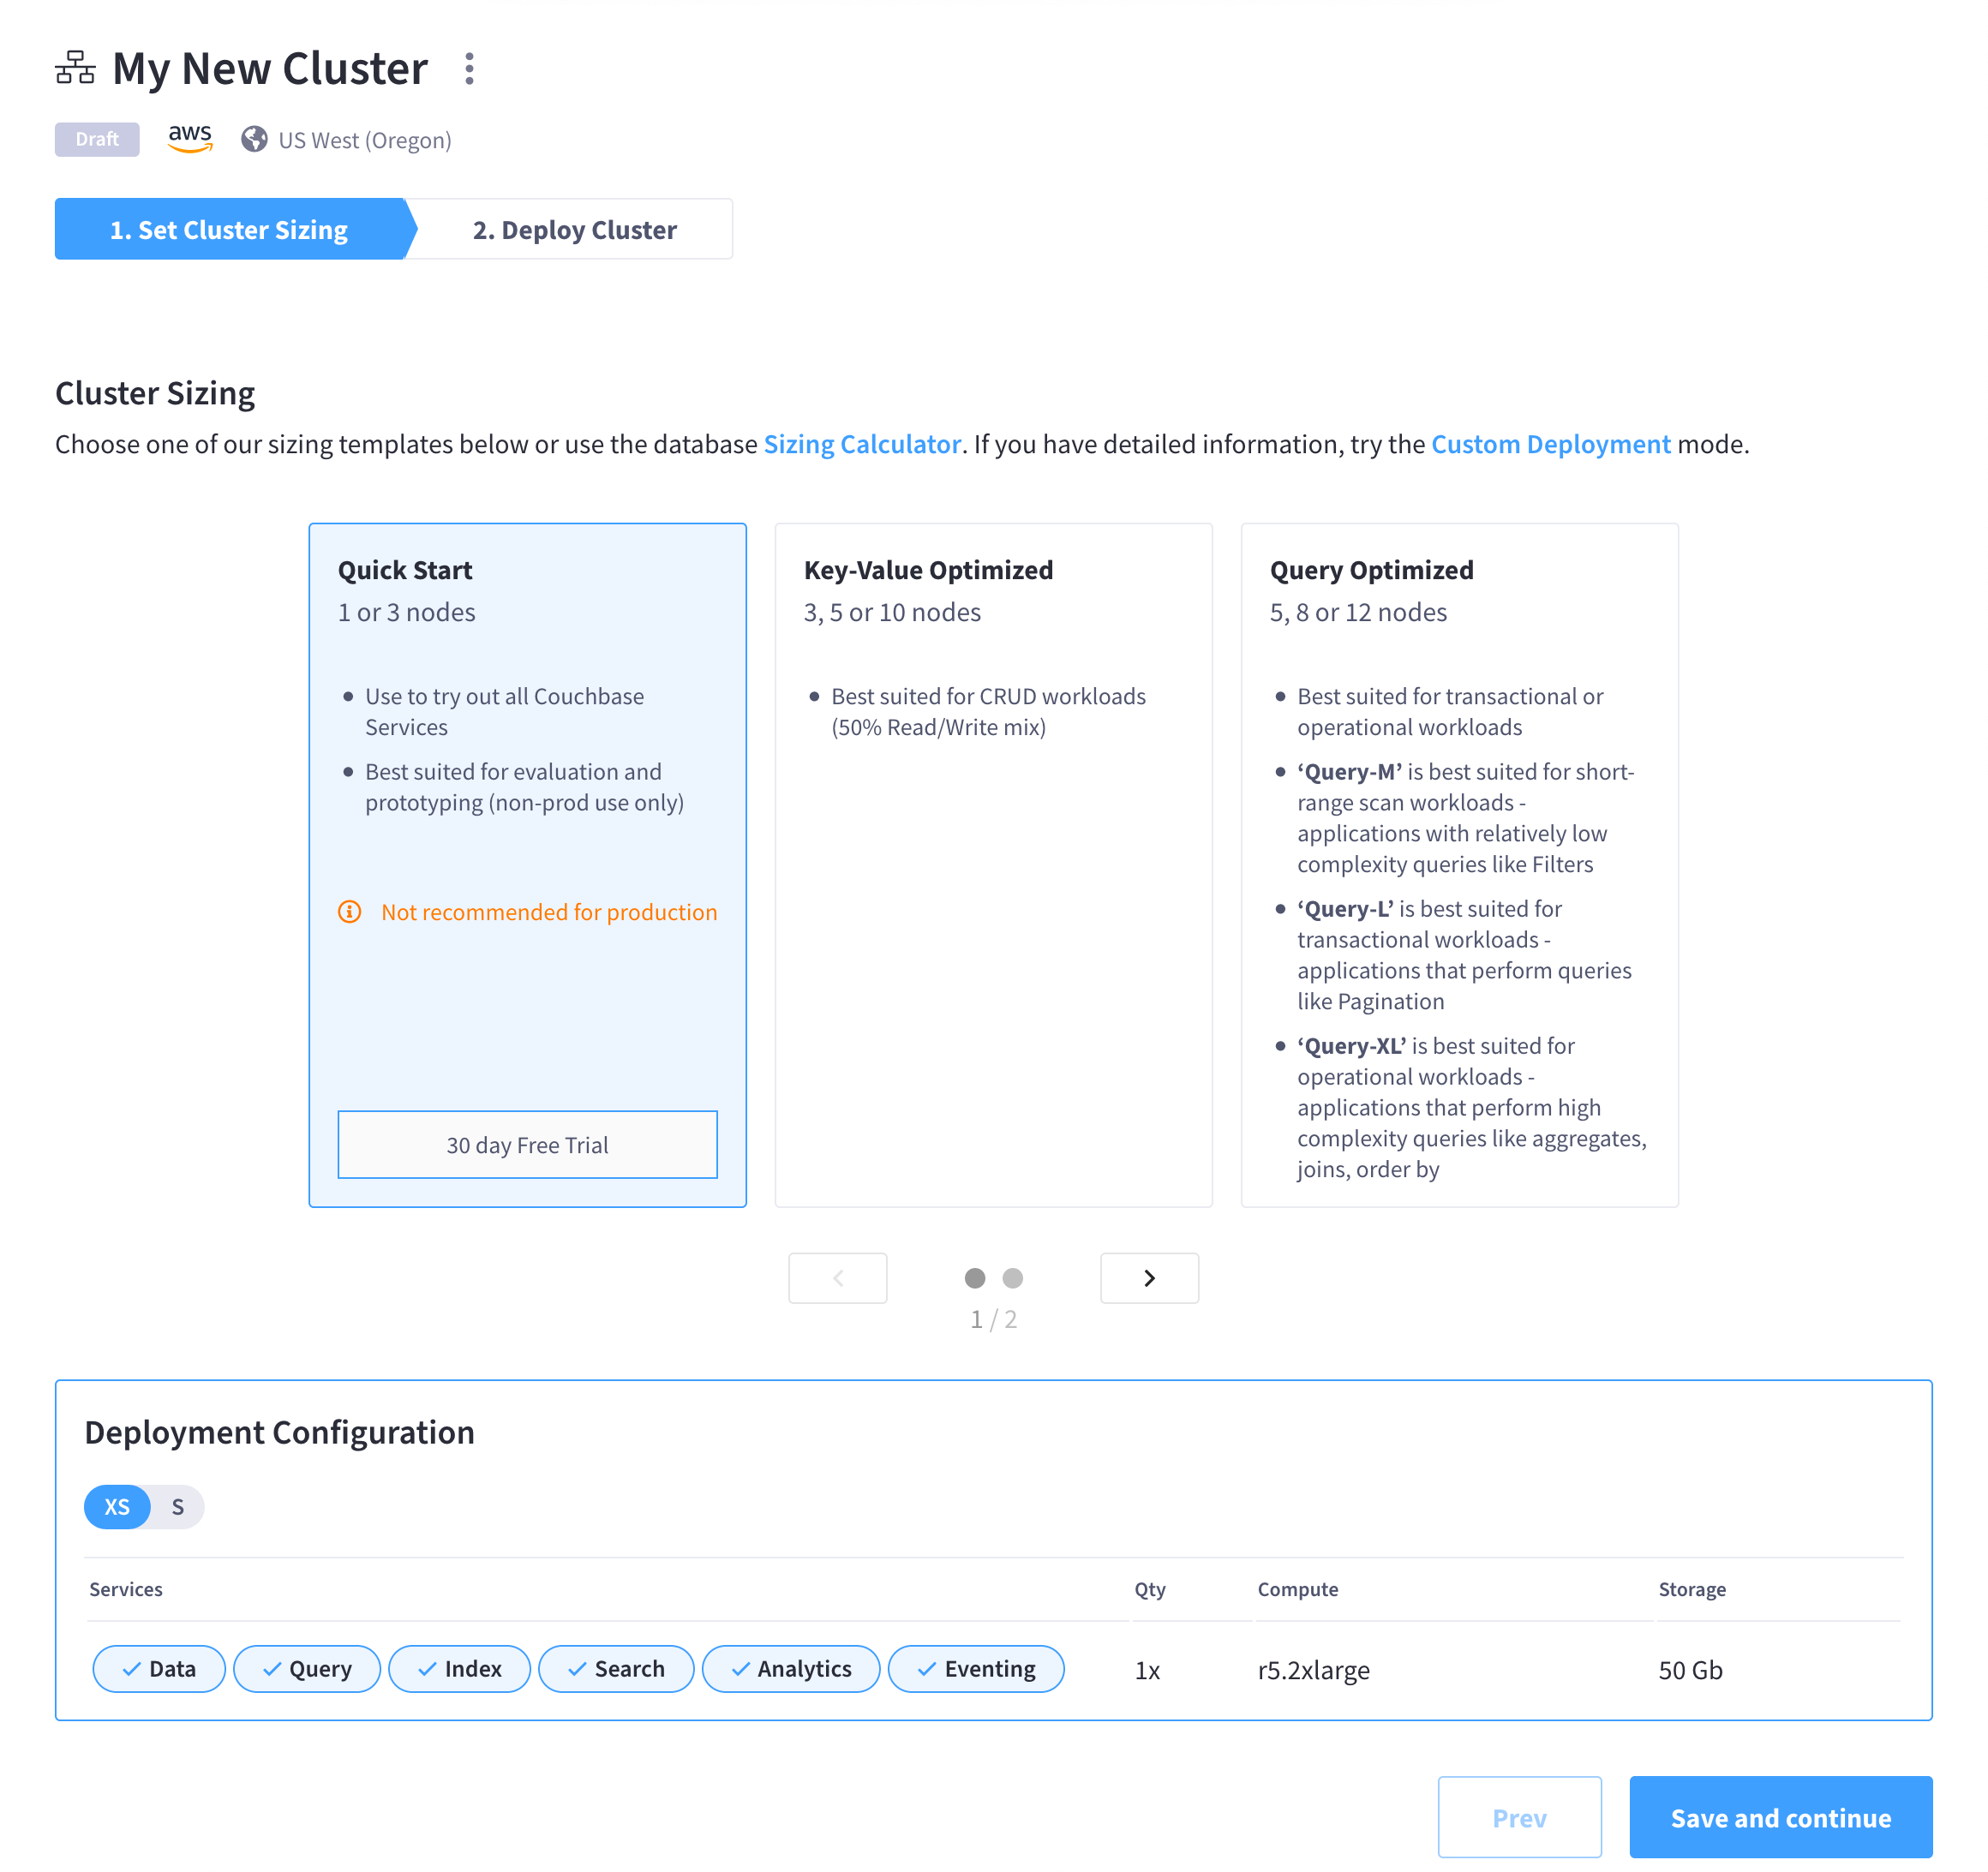
The Set Cluster Sizing screen provides several different approaches to help you size and configure your cluster:
- Templates (Simple)
-
Cluster templates provide pre-defined cluster configurations that are based on common workloads. Each template has a variety of different sizes, and selecting one will populate the entire cluster configuration for you.
Read more about how to use templates.
- Sizing Calculator (Intermediate)
-
If you already know a little bit about the data that you’ll be storing and how you’ll be using it, you can use the Sizing Calculator to help you size your cluster configuration so that it is tailored to your needs.
Read more about how to use the Sizing Calculator.
- Custom Deployment Mode (Advanced)
-
The Custom Deployment mode allows you the most granular control over sizing and configuring your cluster. This option works well if you already have experience with Couchbase Server and/or want to re-create an existing Couchbase deployment using Couchbase Cloud.
Read more about how to use the Custom Deployment mode.
Once you’ve configured the cluster to your liking, click Save and continue.
-
Deploy the cluster.
Now that the cluster has been sized and configured, it’s ready to deploy. The Deploy Cluster screen shows a summary of the configuration details.
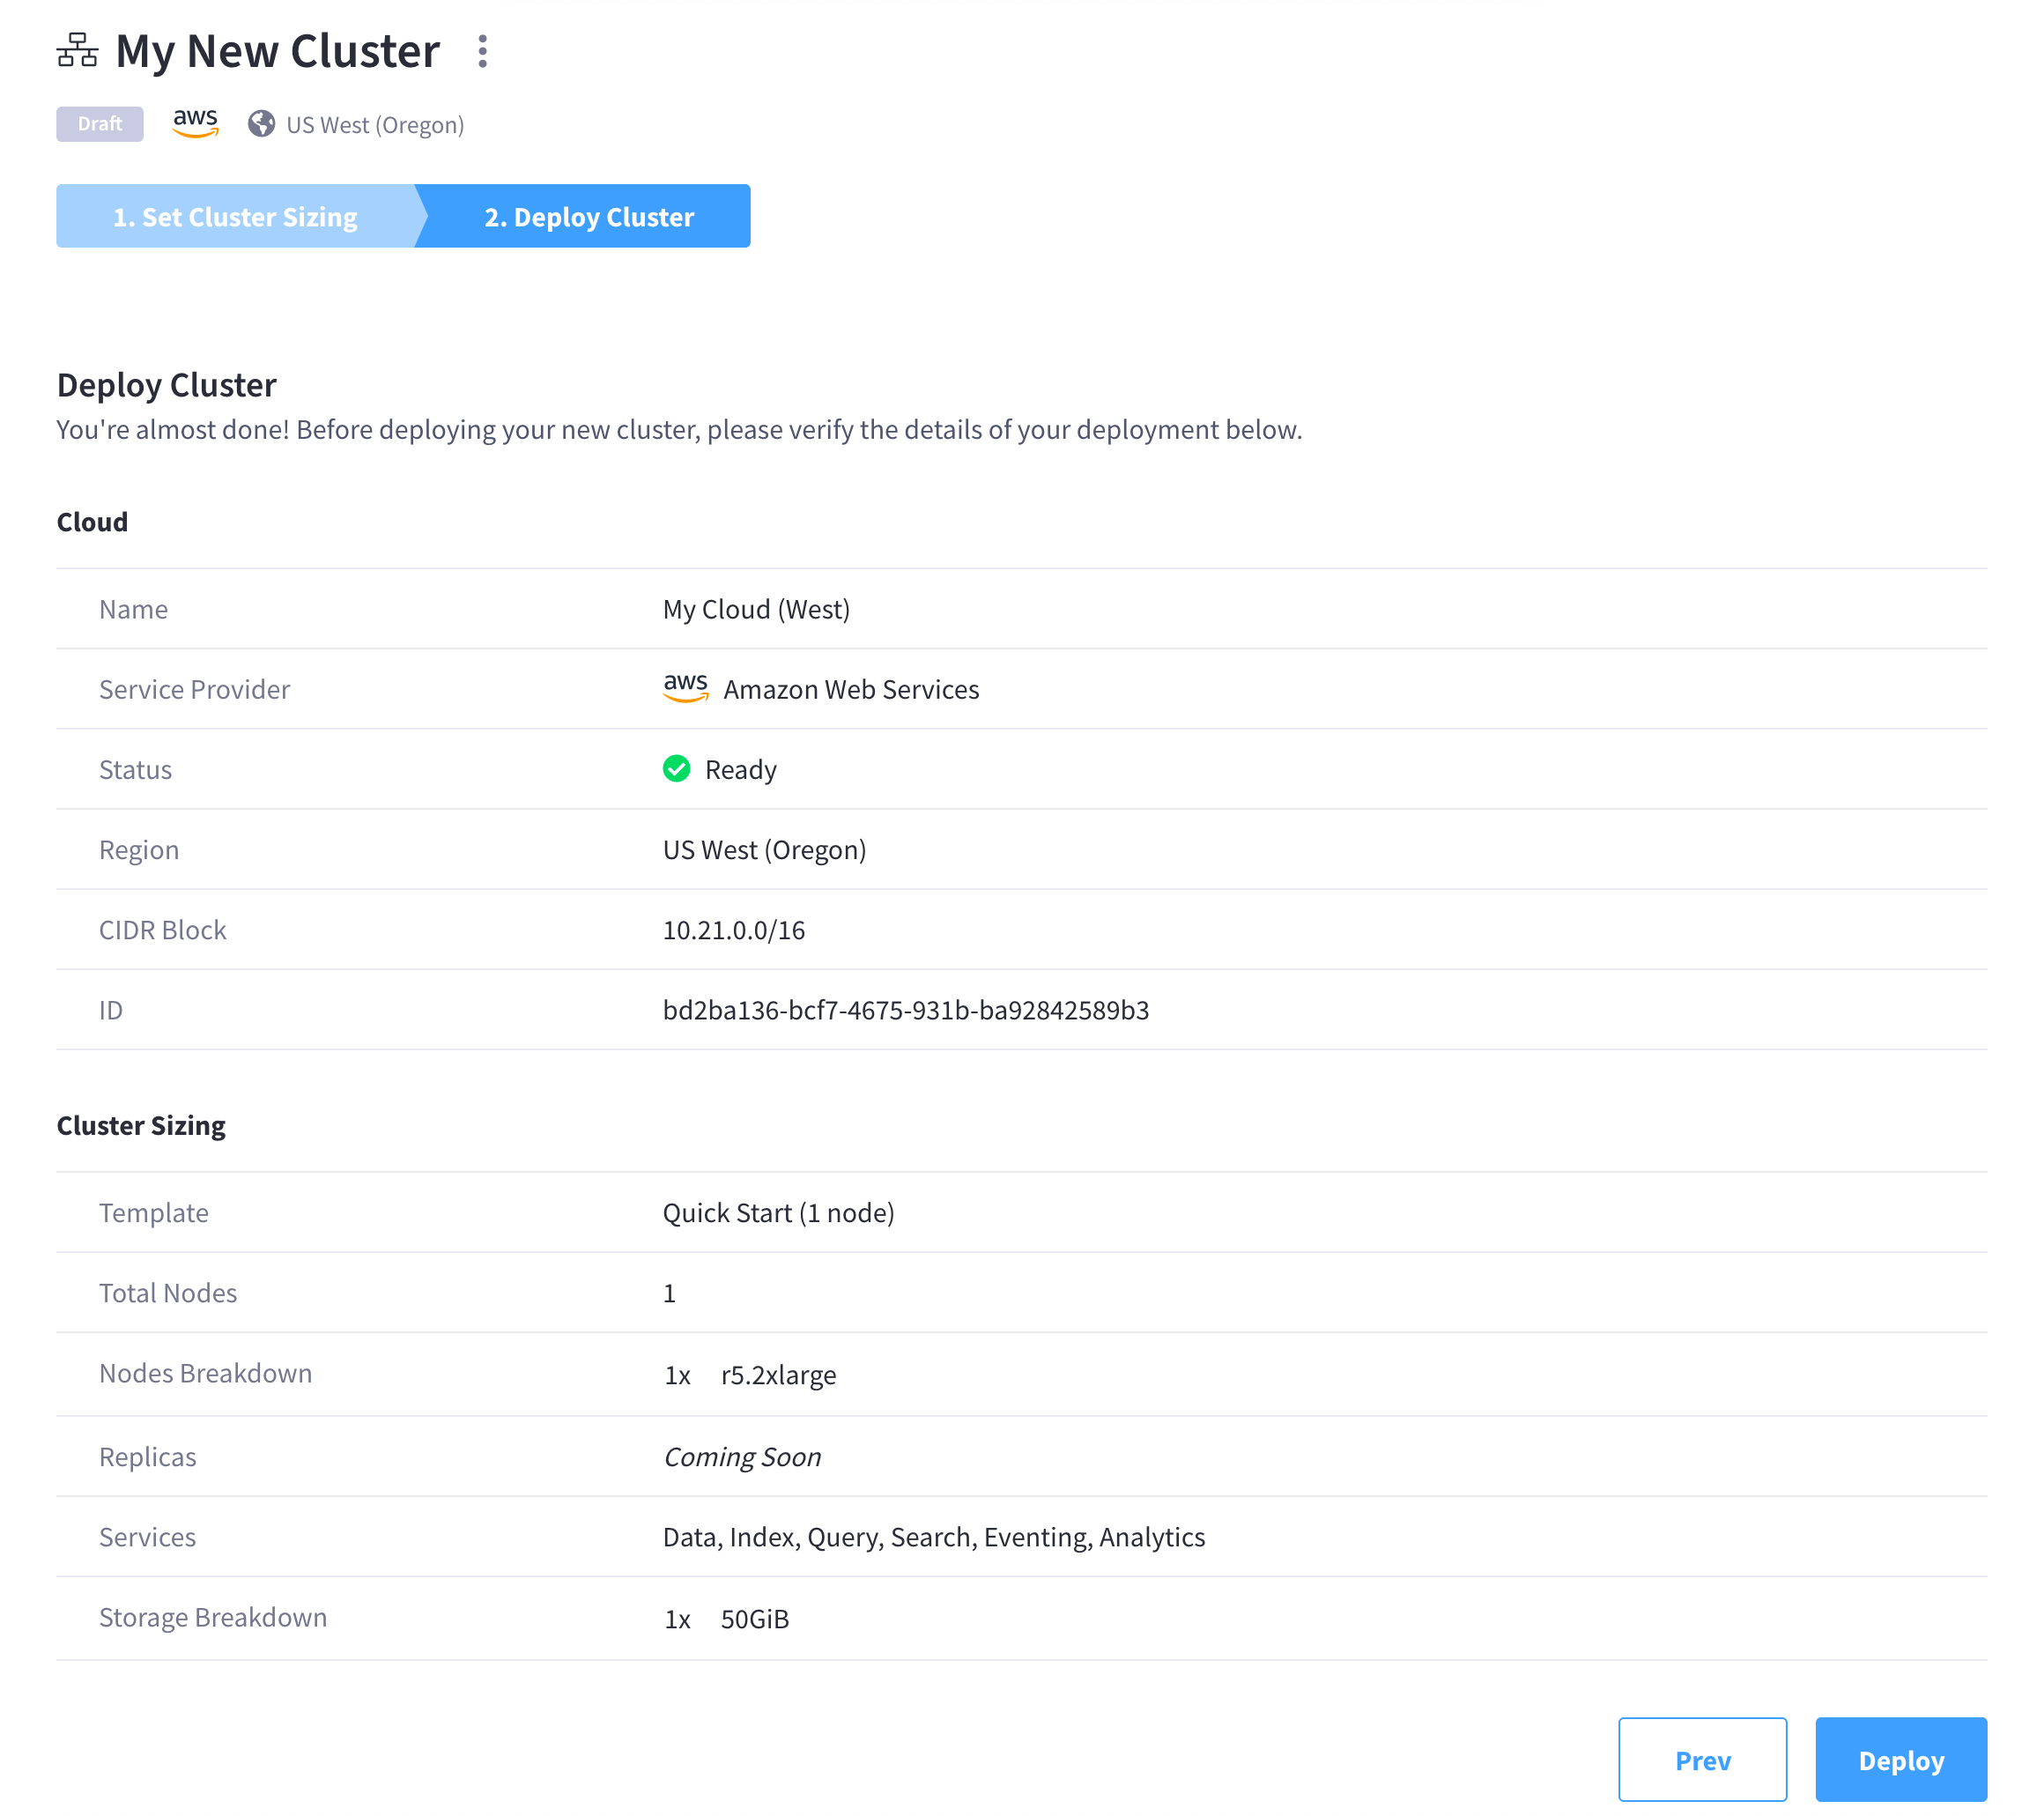
If you’re satisfied with the configuration, click Deploy.
Couchbase Cloud will proceed with automatically deploying the cluster on your connected cloud.
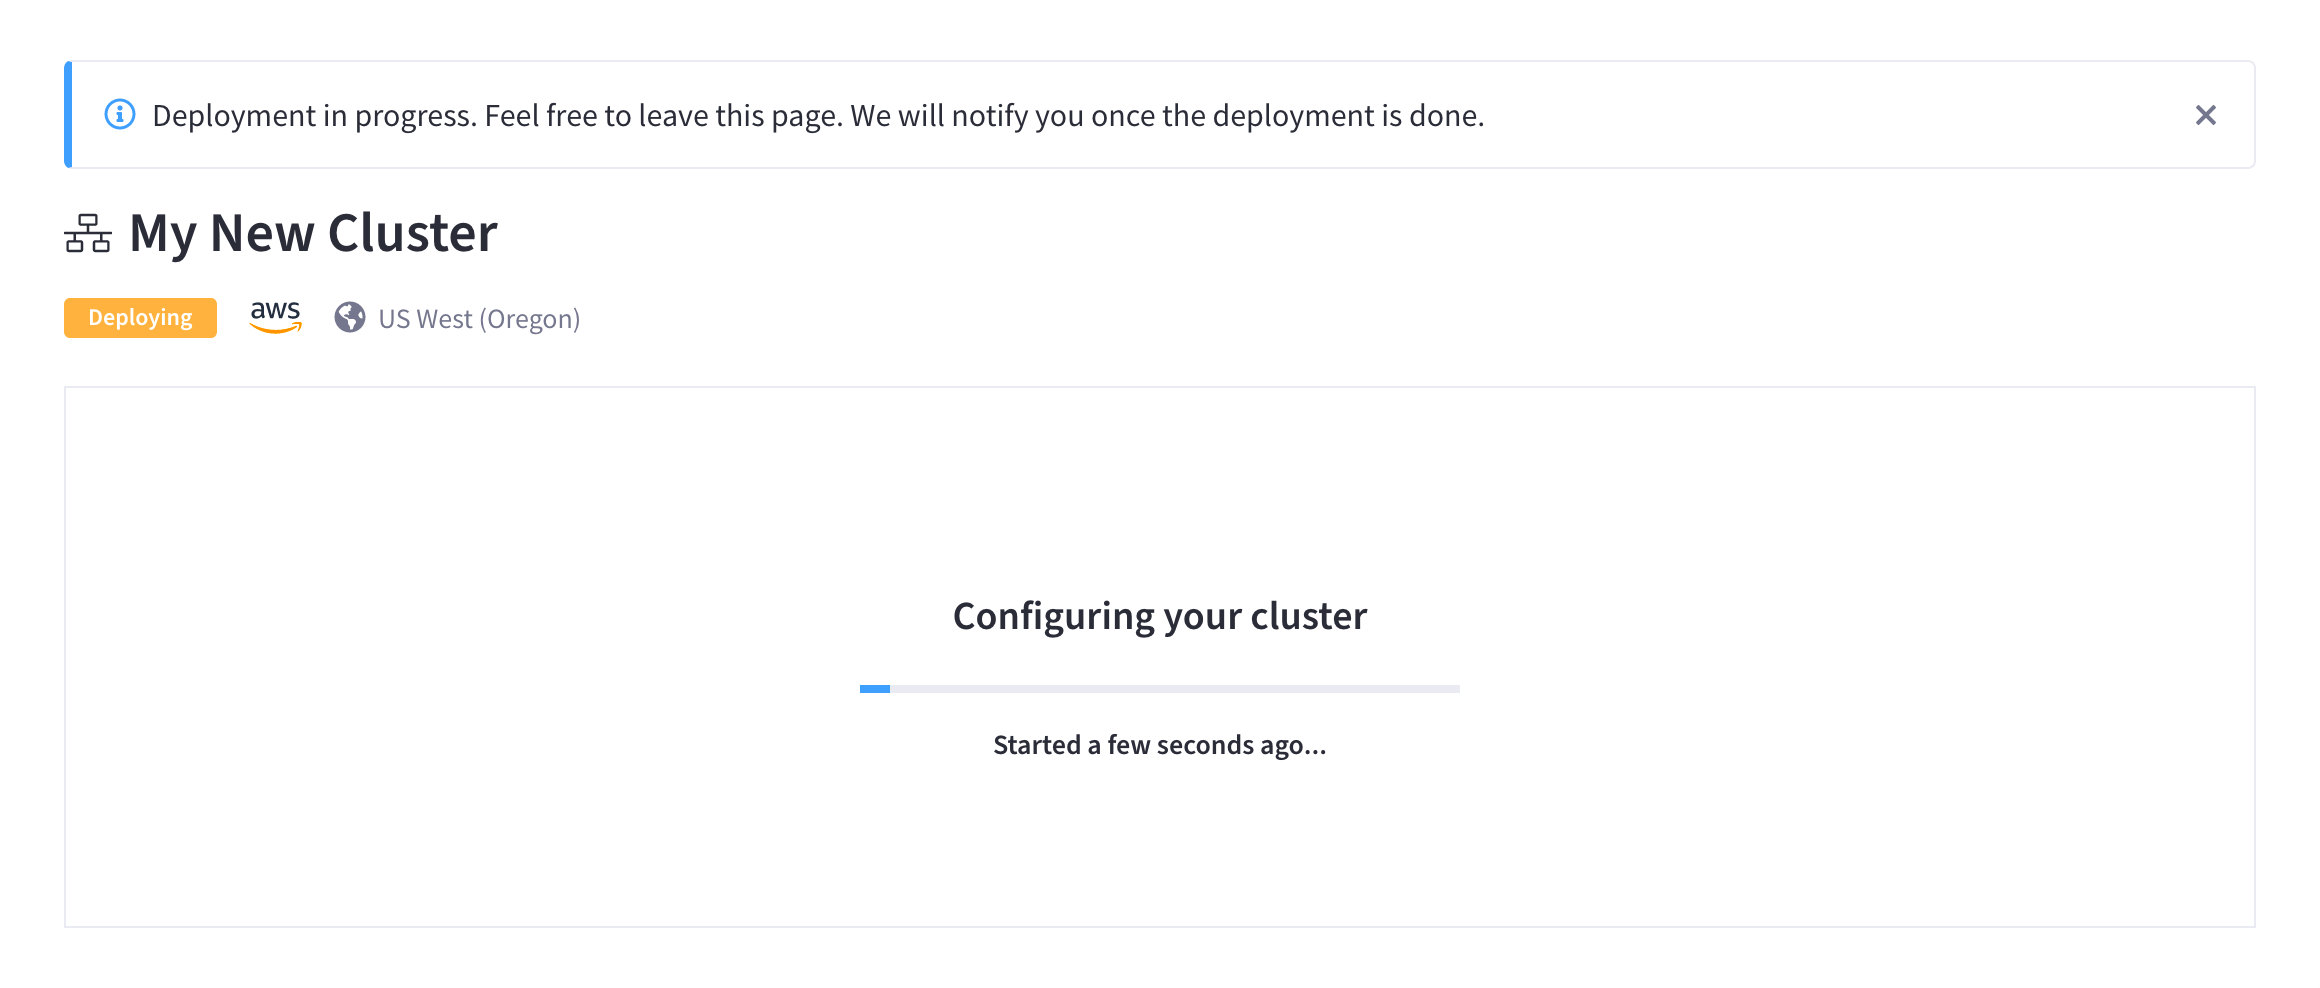
Once the deployment begins, Couchbase Cloud will provision and maintain cluster resources in your cloud account. These resources will incur infrastructure cost in your cloud account for the lifecycle of the cluster. A cluster will generally take up to 15 minutes to deploy, though it can take longer depending on factors such as cluster size and cloud provider performance.
Leaving the page will not affect deployment progress, and you can feel free to return to the cluster page at any time. You’ll receive a notification when the deployment is done.