Manage Projects
Create projects to contain, and allow access to, Couchbase clusters.
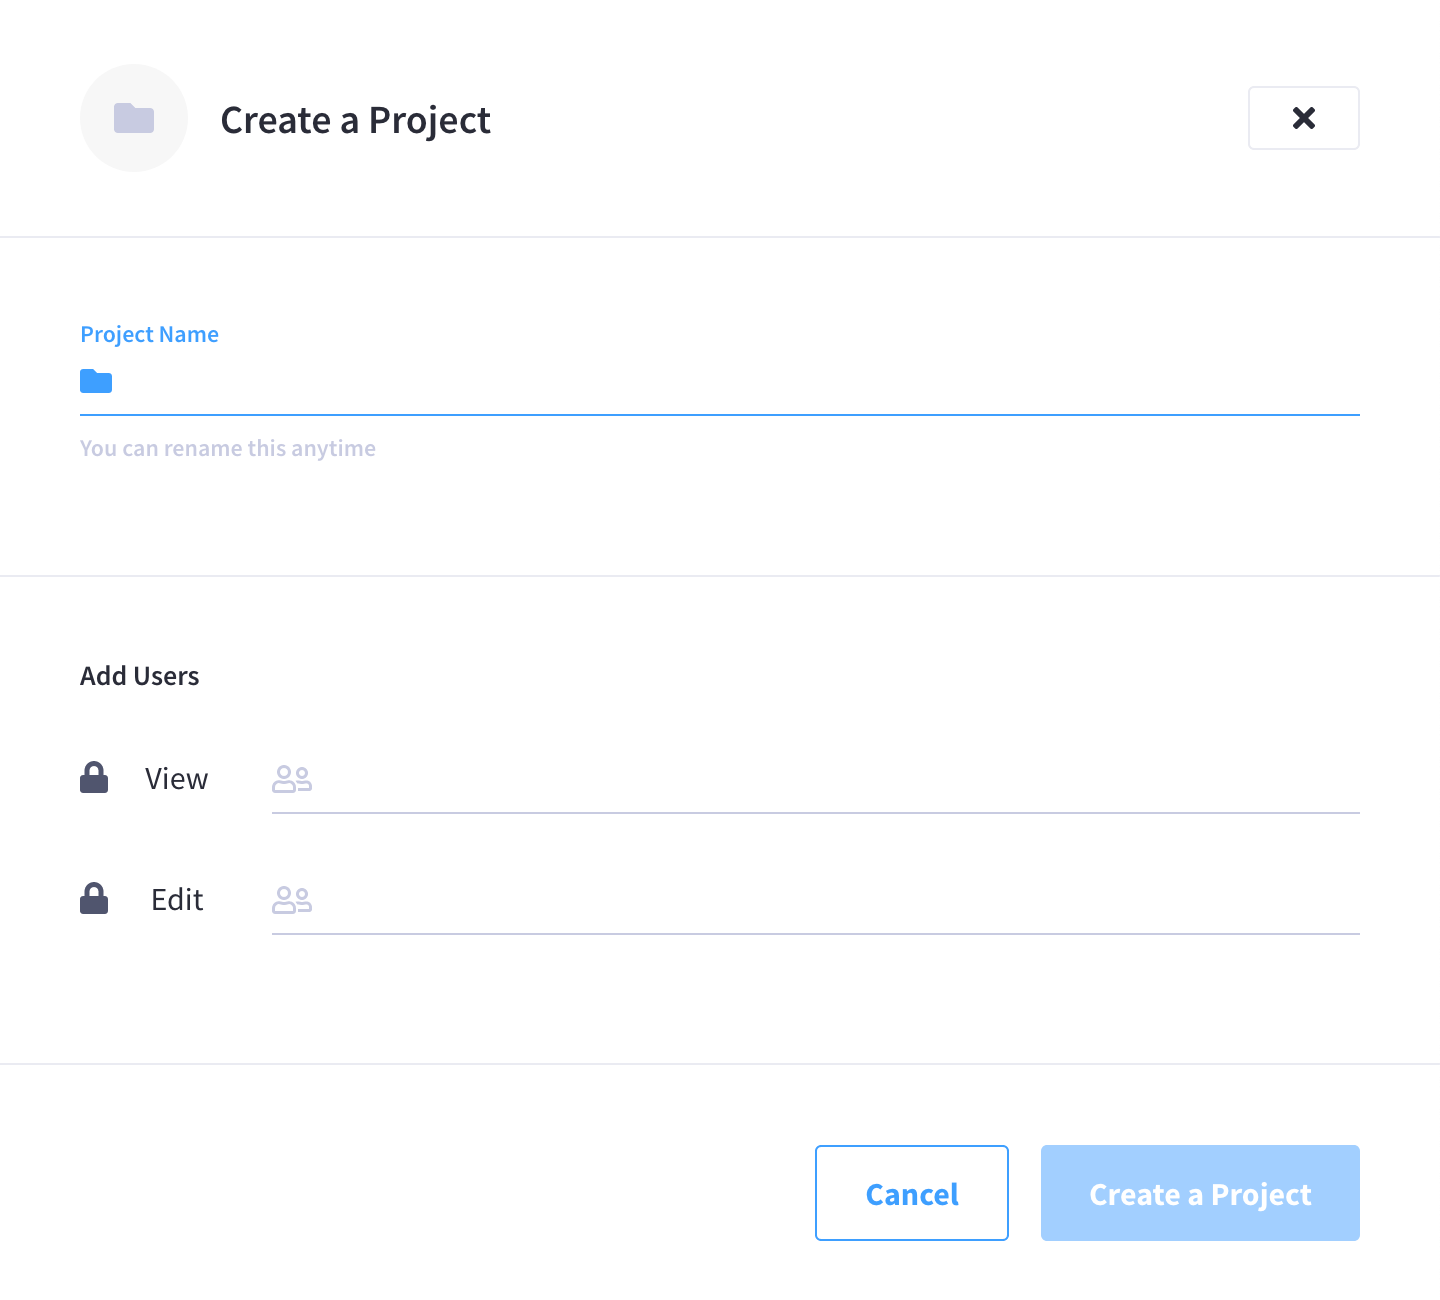
Create a Project
Prerequisites
To create a project, you must have Organization Edit privileges.
Procedure
-
Go to the Projects tab.
-
Click Add Project.
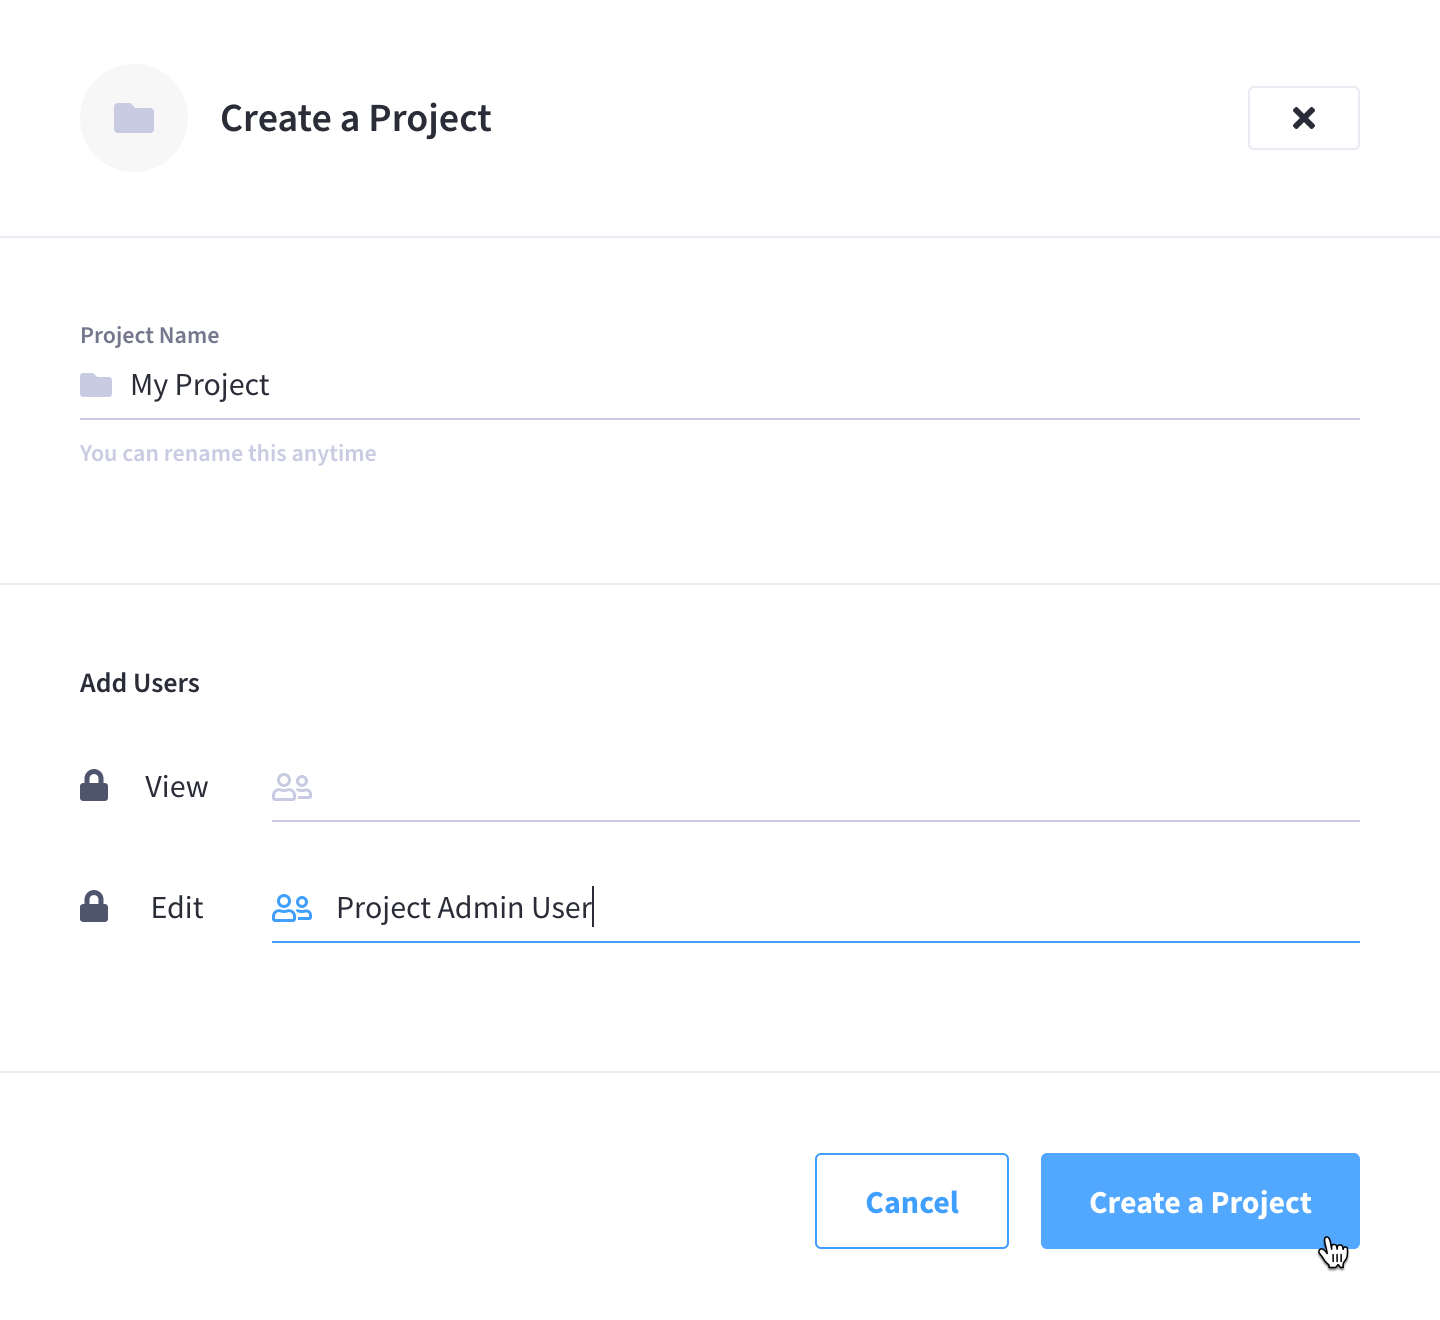
This opens the Create a Project slide-out menu:
-
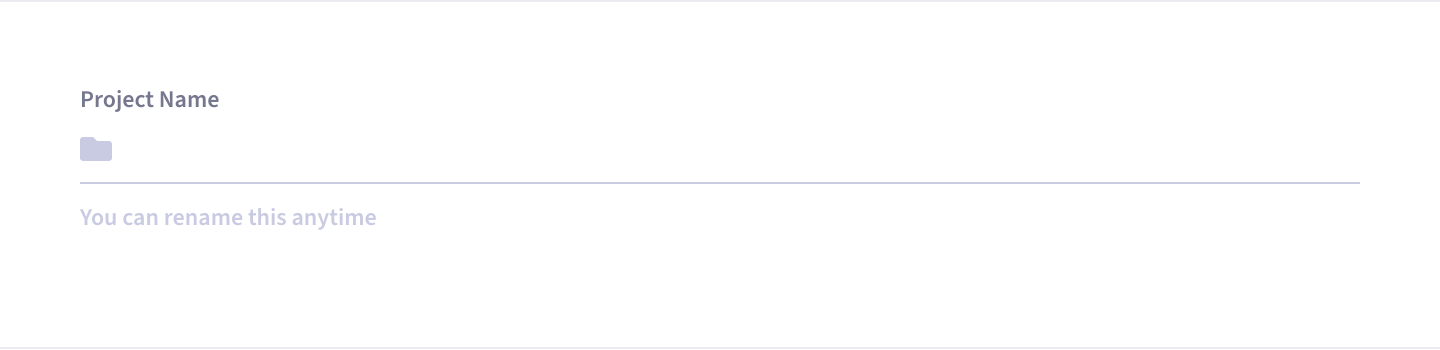
Enter a name for the project.
-
(Optional) Add users to the project.
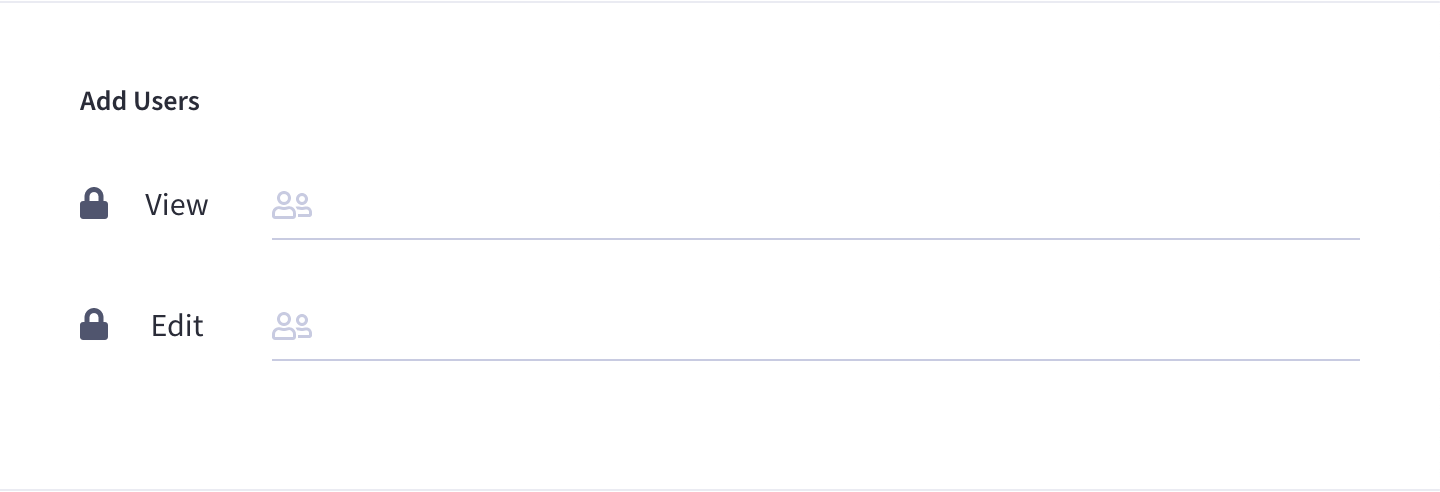
In the Add Users section, you have the option to add organization users to a project. (If you don’t add users to the project at this point, you can always add them later.)
-
In the View field, enter the names of the users that you want to have
Project Viewpermissions in the project. -
In the Edit field, enter the names of the users that you want to have
Project Editpermissions in the project.
If the user is already a member of the organization, the user’s name will auto-complete. If the user is not yet part of the organization, you will first need to invite that user to your organization before you can add them to a project.
-
-
Once you’re satisfied with the configuration, click Create a Project.
After the project is created, members of the project that have Project Edit privileges can start creating clusters in the project.
Add Users to an Existing Project
You can add users to a project either during project creation, or after the project is created. This procedure describes how to add users to a project after the project is created.
Prerequisites
To add a user to a project, you must have either Organization Edit privileges, or Project Edit privileges for the project that you are adding users to.
Procedure
-
Go to the Projects tab.
-
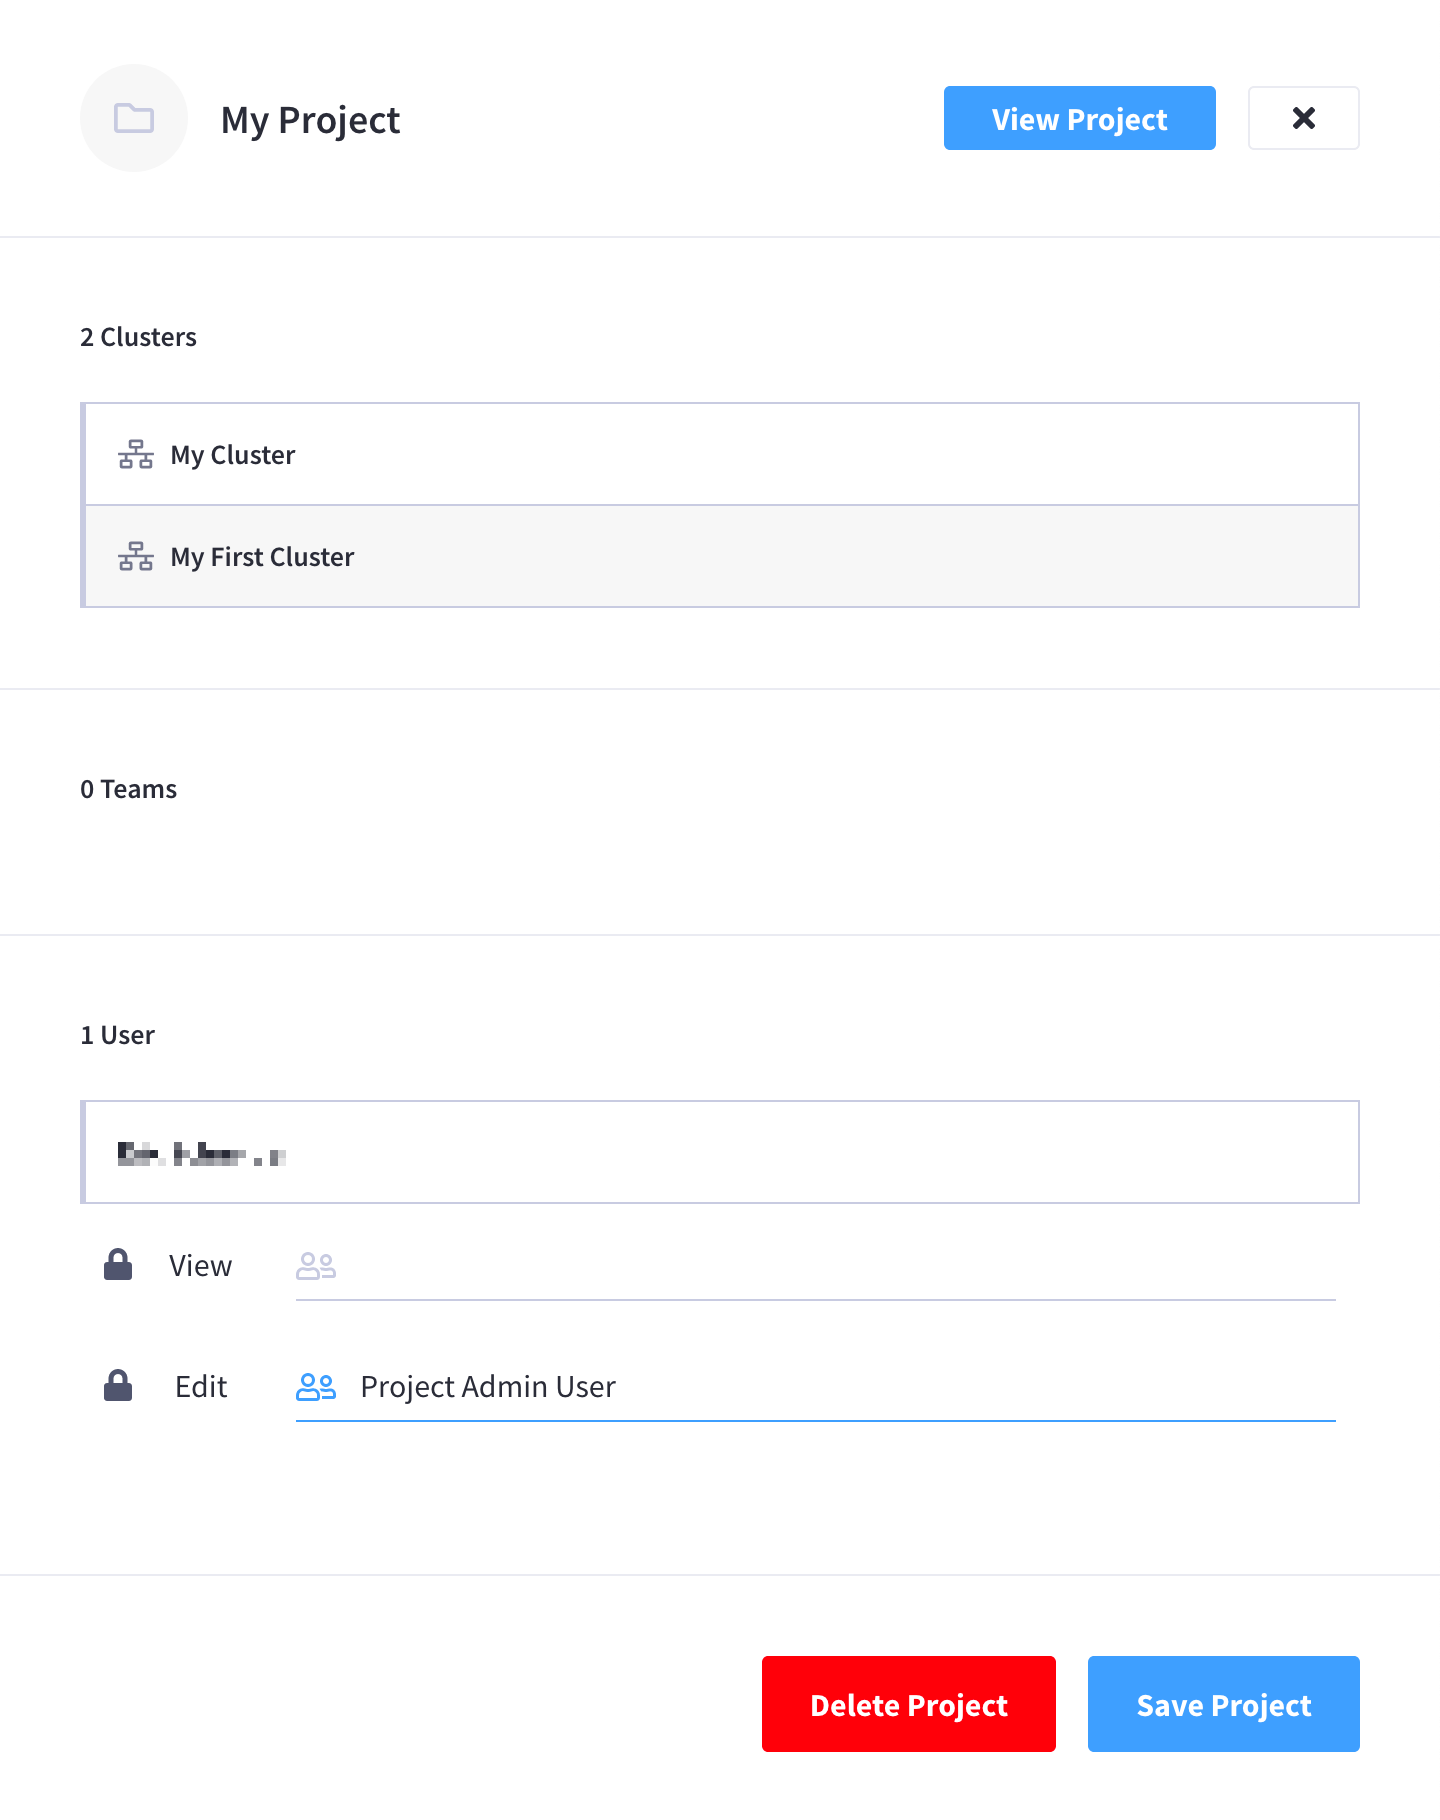
Find the project that you wish to add users to, and click on its name.
This opens the project’s slide-out menu:

-
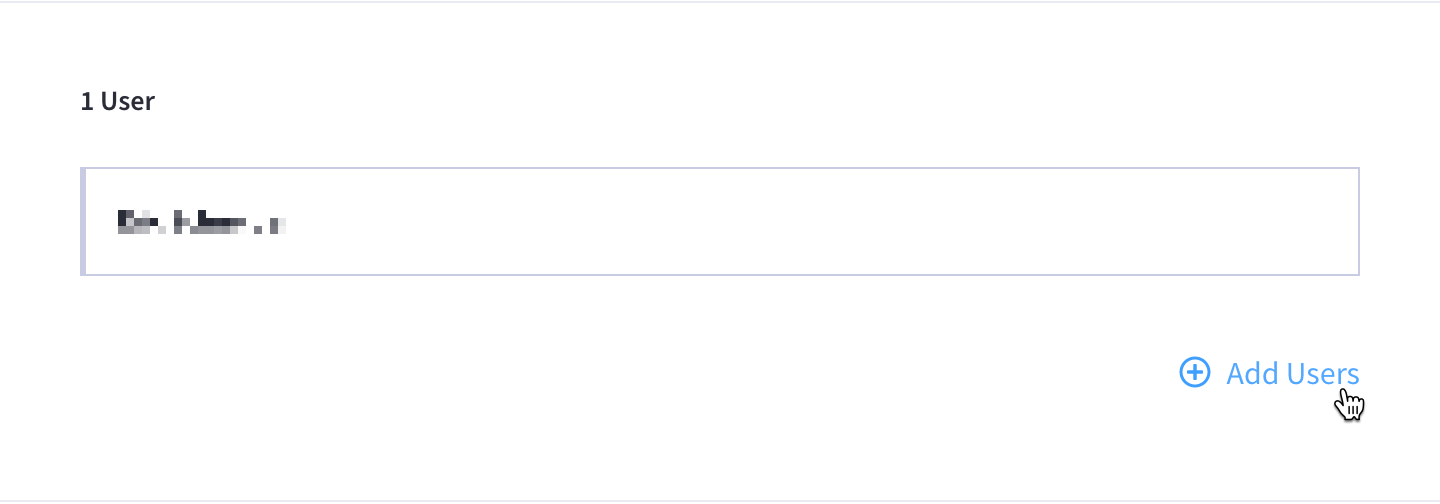
Locate the Users section and click Add Users.
-
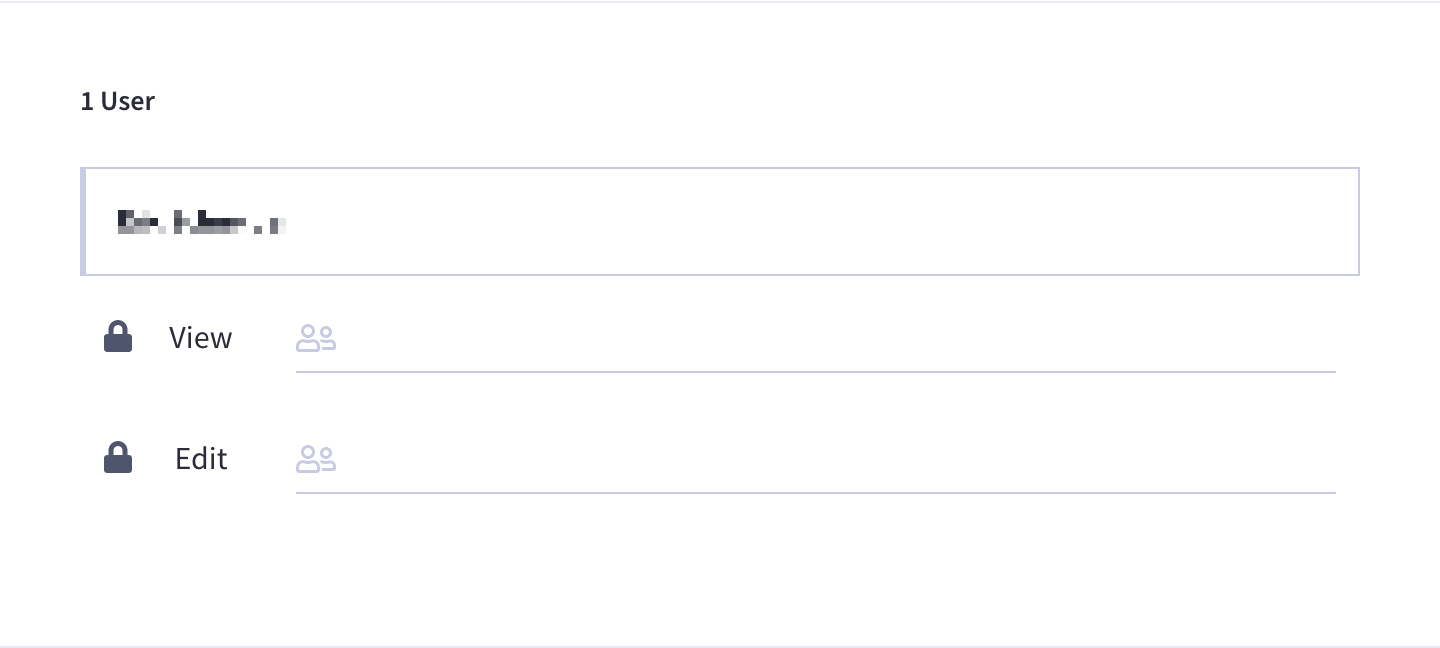
Enter the names of the users that you want to add to the project.
-
In the View field, enter the names of the users that you want to have
Project Viewpermissions in the project. -
In the Edit field, enter the names of the users that you want to have
Project Editpermissions in the project.
If the user is already a member of the organization, the user’s name will auto-complete. If the user is not yet part of the organization, you will first need to invite that user to your organization before you can add them to a project.
-
-
Once you’ve added all the desired users, click Save Project.
Remove Users from a Project
Prerequisites
To remove a user to a project, you must have either Organization Edit privileges, or Project Edit privileges for the project that you are removing users from.
Procedure
-
Go to the Users tab.
-
Find the user that you wish to remove from a project, and click on their name.
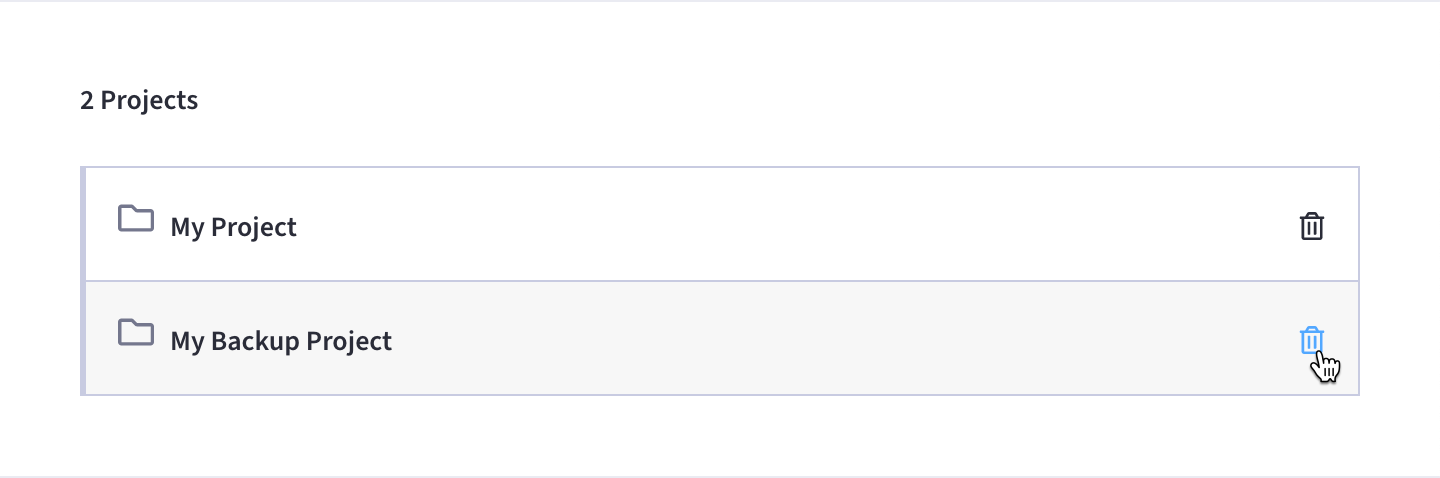
This opens the user’s slide-out menu:
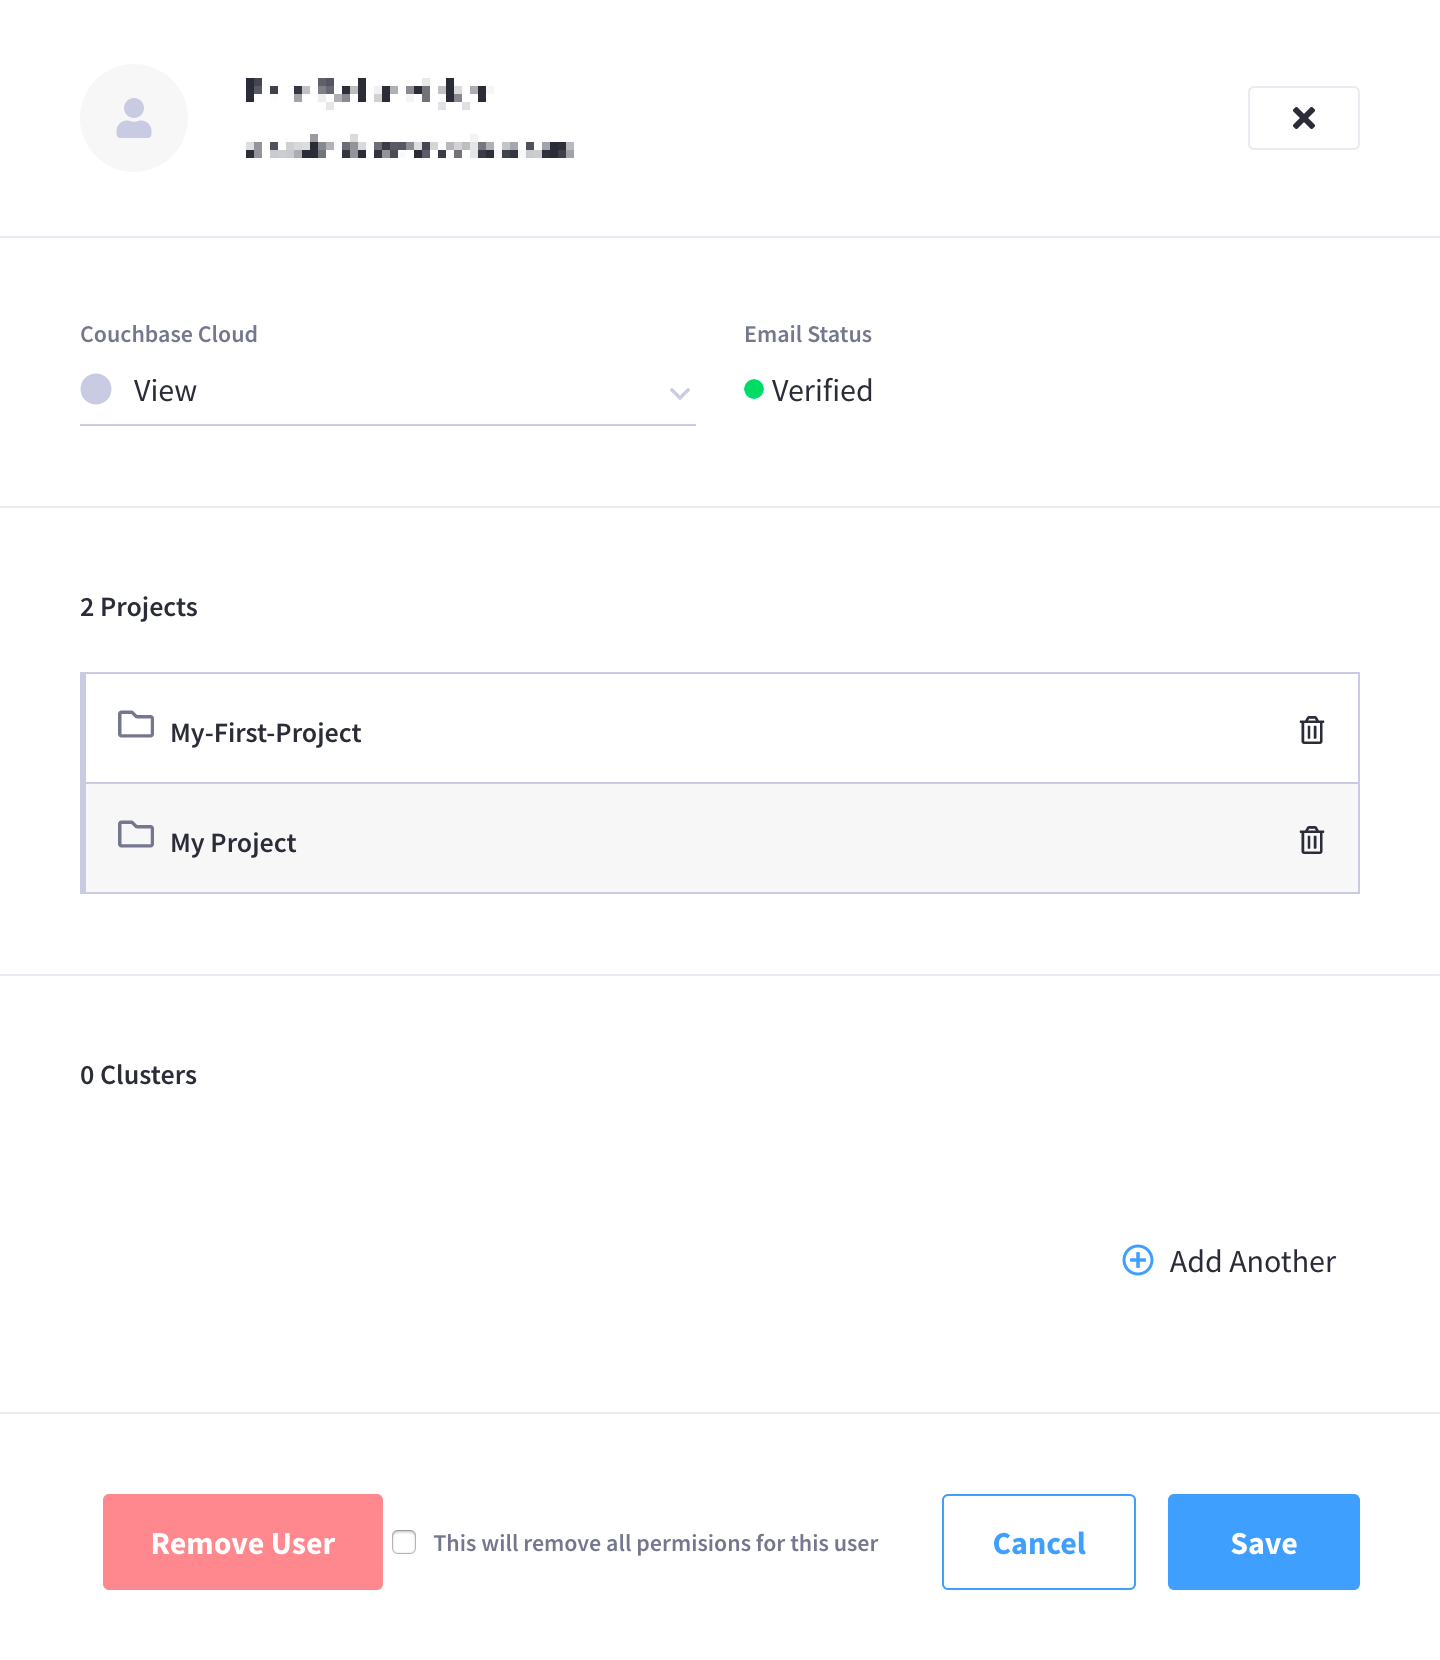
-
Remove the user from a project.
Locate the Projects section and click the Trash icon next to each of the projects that you want to remove the user from.
-
Click Save to finish.
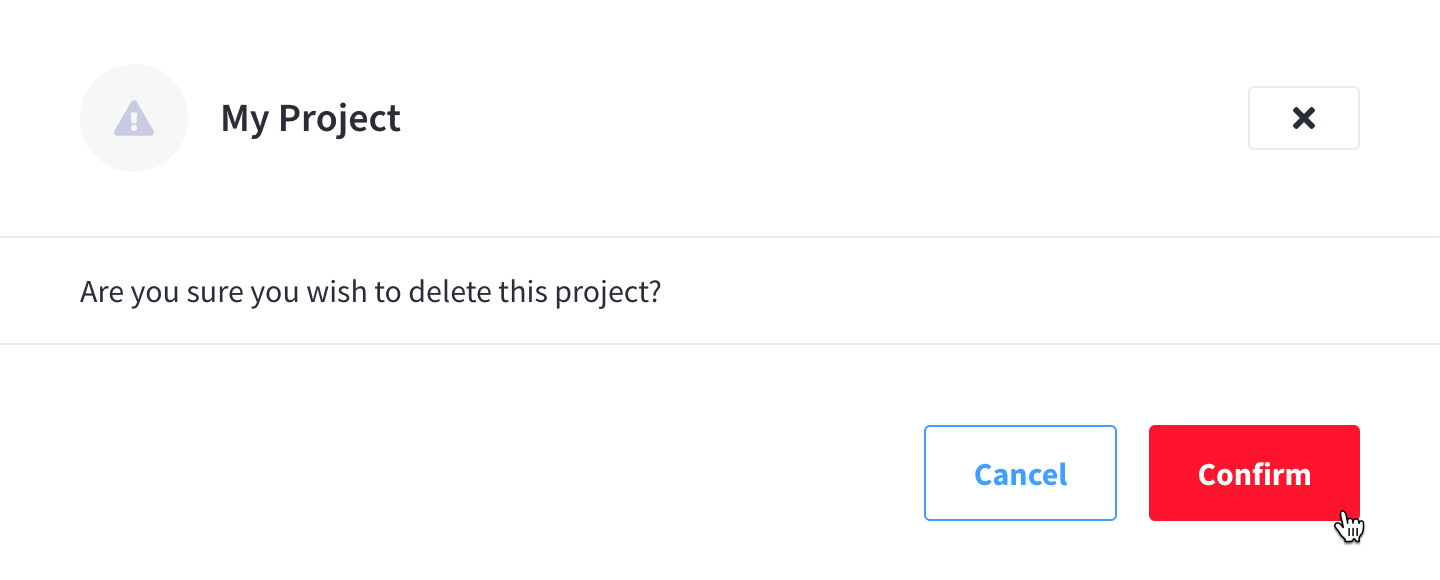
Delete a Project
Prerequisites
To delete a project:
-
You must have either
Organization Editprivileges, orProject Editprivileges for the project that you wish to delete. -
You must have deleted all clusters in the project. (Couchbase Cloud does not allow a project to be deleted if clusters are present.)