Mange Organization Users
Invite users to an organization and manage their access to projects and clusters.
Add/Invite Users to an Organization
Prerequisites
To add a user to an organization:
-
You must have
Organization Adminprivileges. -
You must have the email address of the person you wish to invite to the organization.
Procedure
-
Go to the Users tab.
-
Click Add Users.
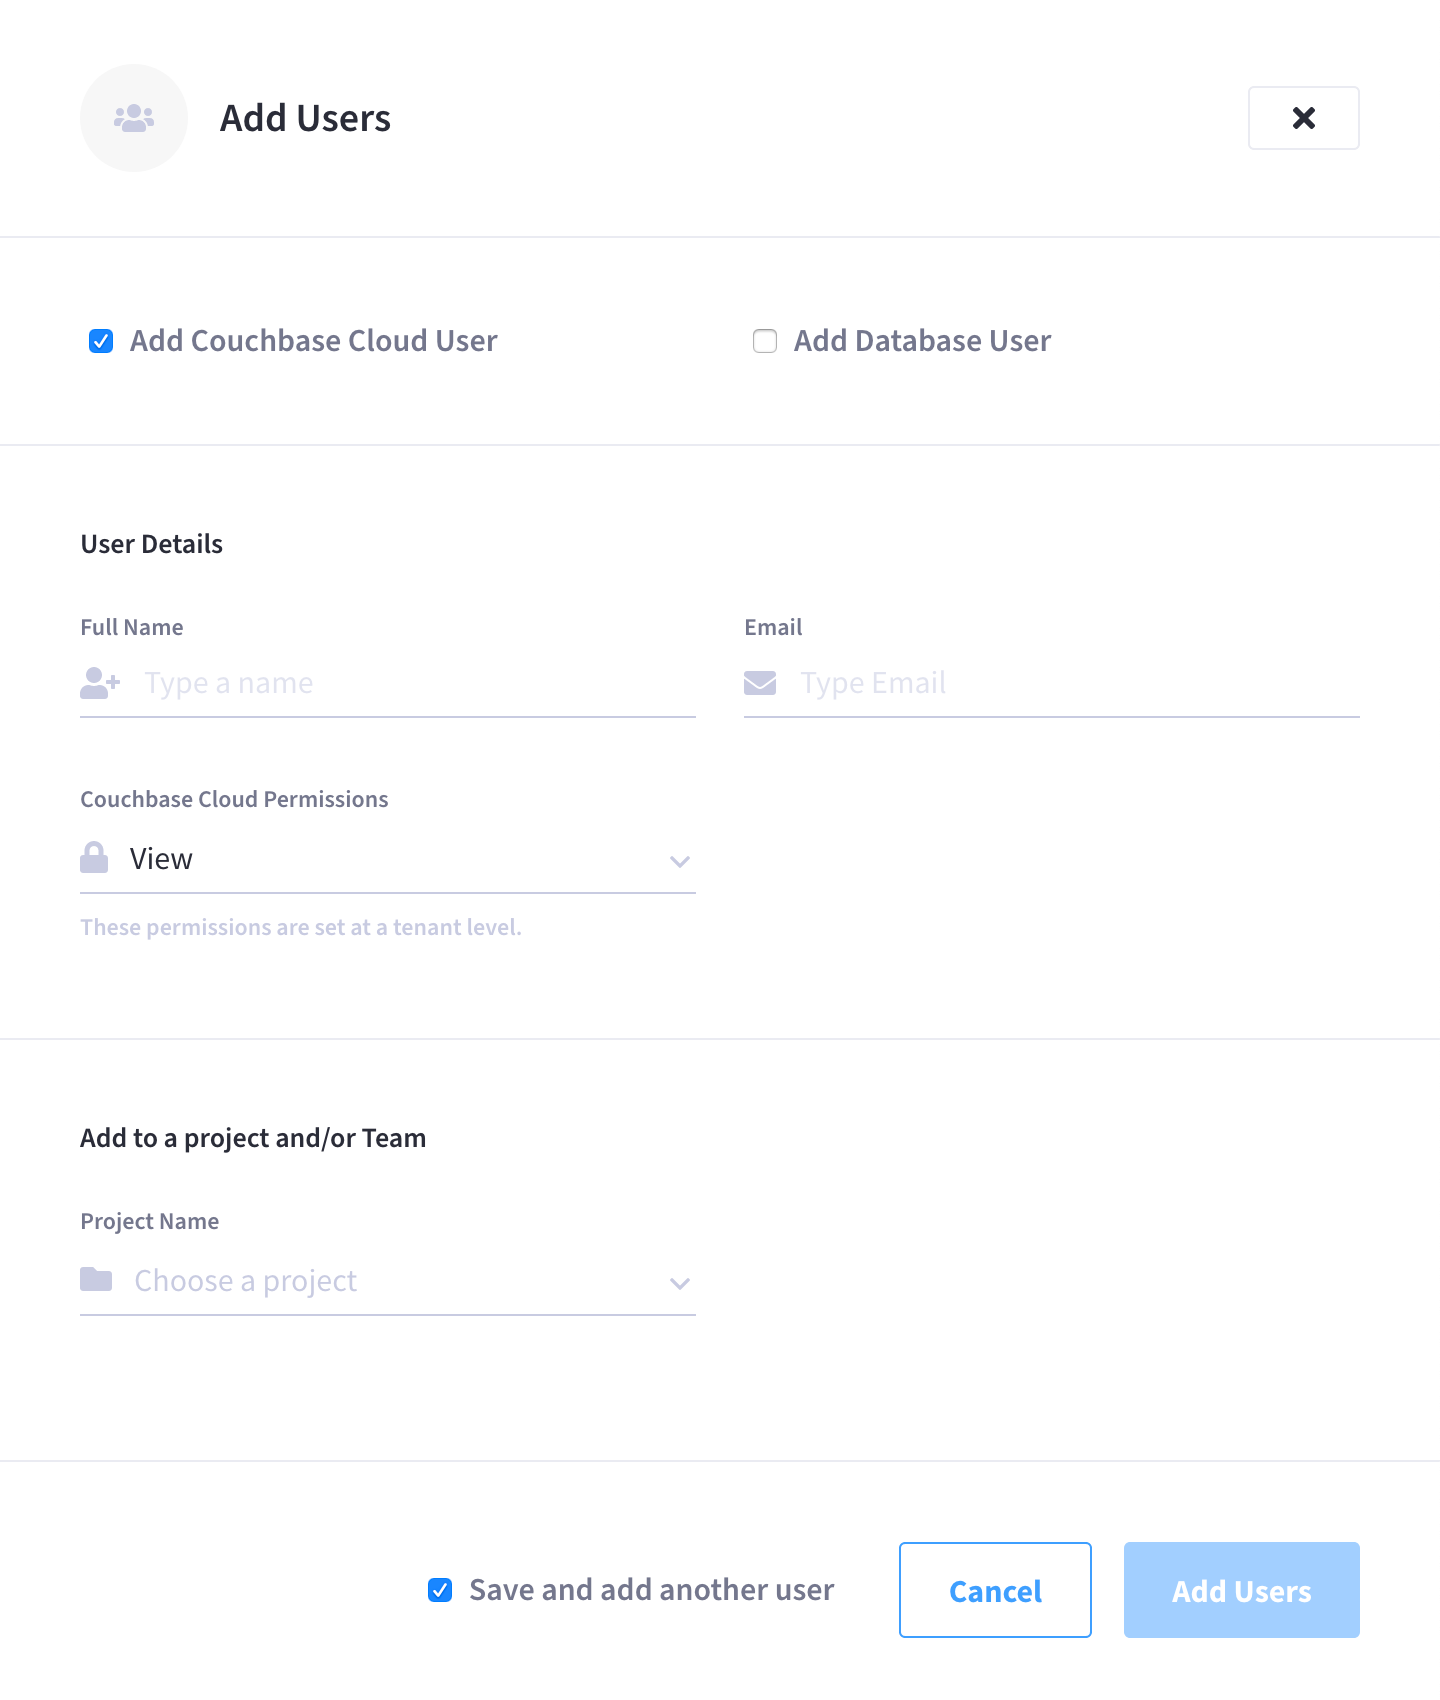
This opens the Add Users slide-out menu:
-
Ensure that Add Couchbase Cloud User is checked.

If you know that the user you’re inviting will need access to certain cluster databases right away, you can add a database user for them by checking the Add Database User checkbox. For more information about adding database users, refer to Manage Database Users.
-
Enter the user’s details.
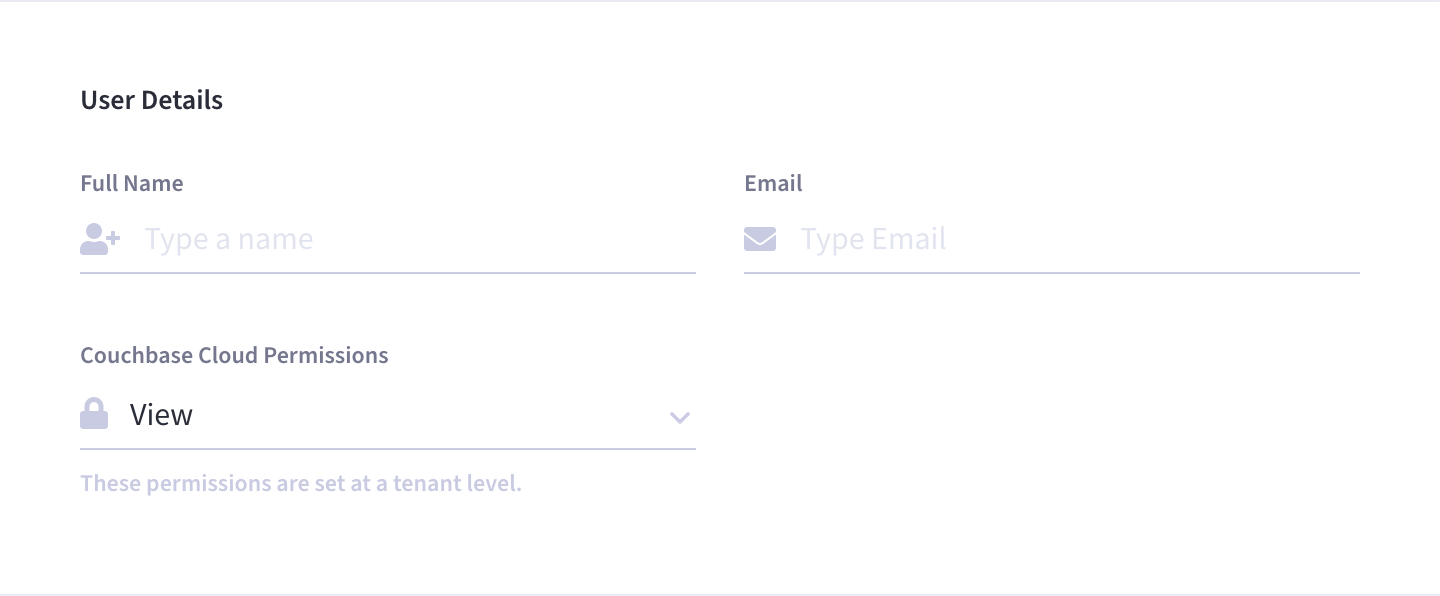
In the User Details section, configure the following:
- Full Name
-
Enter the full name of the person that you’re inviting to your organization. This will be the name that other users will see in the Couchbase Cloud UI.
-
Enter the person’s email address. This is the email address that the invitation will be sent to. It will also be the email address that the person will use to log into Couchbase Cloud.
- Couchbase Cloud Permissions
-
Select an organization role for the user.
-
(Optional) Add the user to a project.
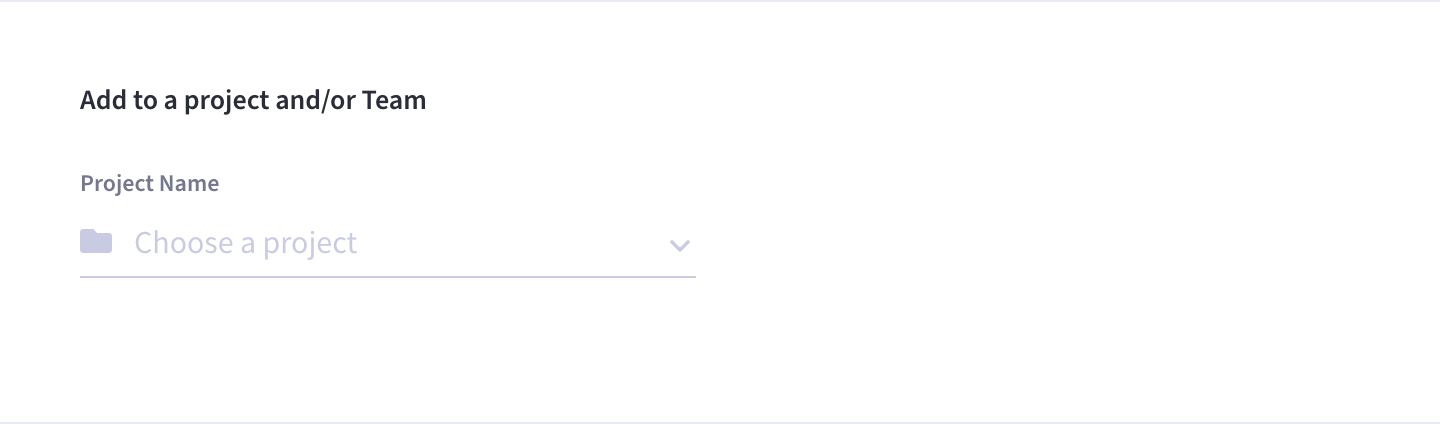
If you already know that the user you’re inviting will need access to certain projects, you can use the Add to a project section to add them directly to a project.
-
To add the user to a project, use the Project Name drop-down list to select the desired project.
-
-
Once you’ve configured all of the required fields, click Add Users.
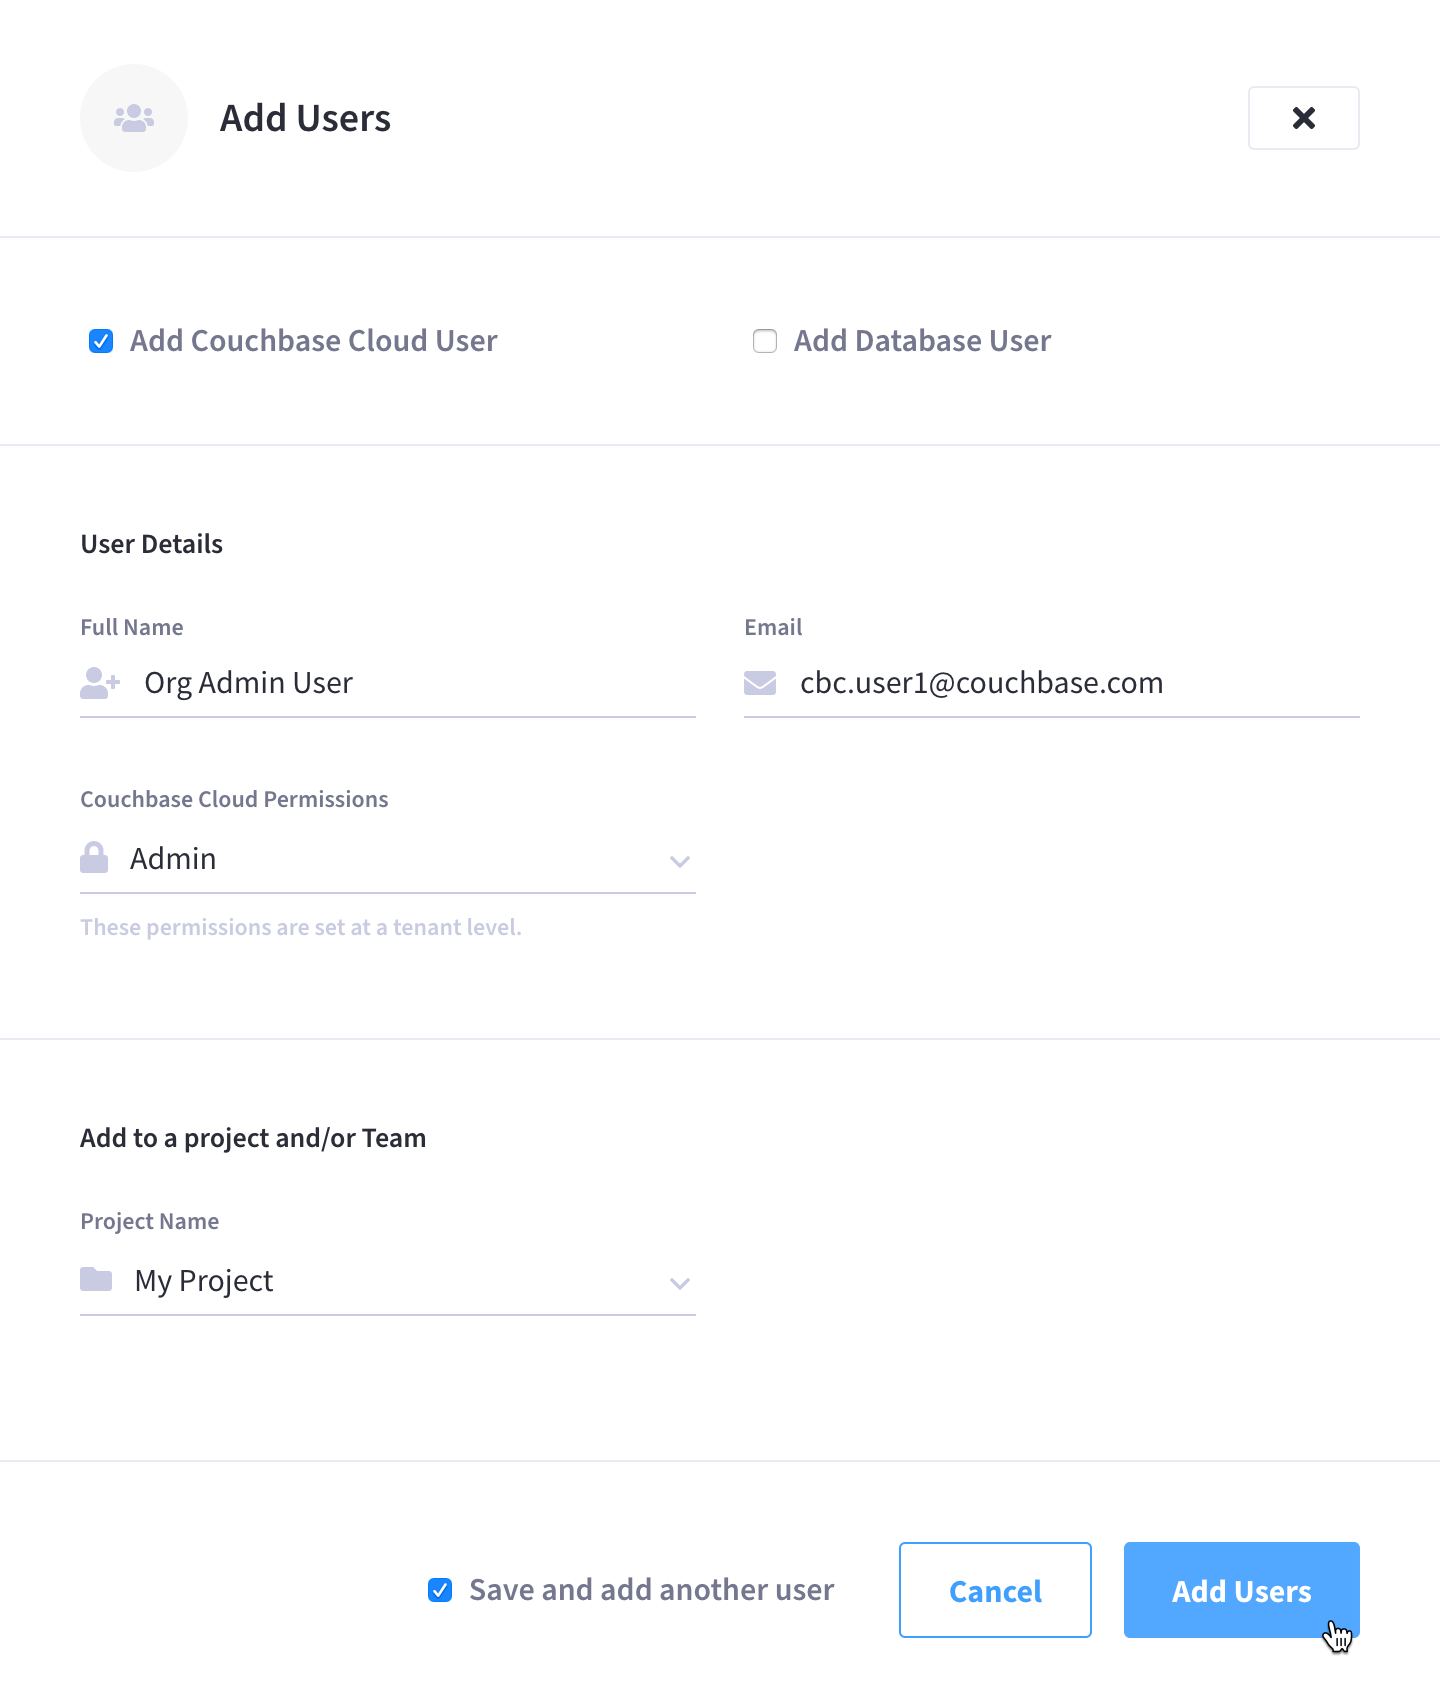
Note that if you’re adding multiple users, checking Save and add another user will clear the slide-out menu after adding a user so that you can start adding the next user’s details.
After you add a user, Couchbase Cloud sends that user an email inviting them to join the organization. An invited user will display in the Users view with a pending status until they accept their invitation. A pending user cannot access anything in the organization, including projects and clusters, until they accept the invitation and configure their account.
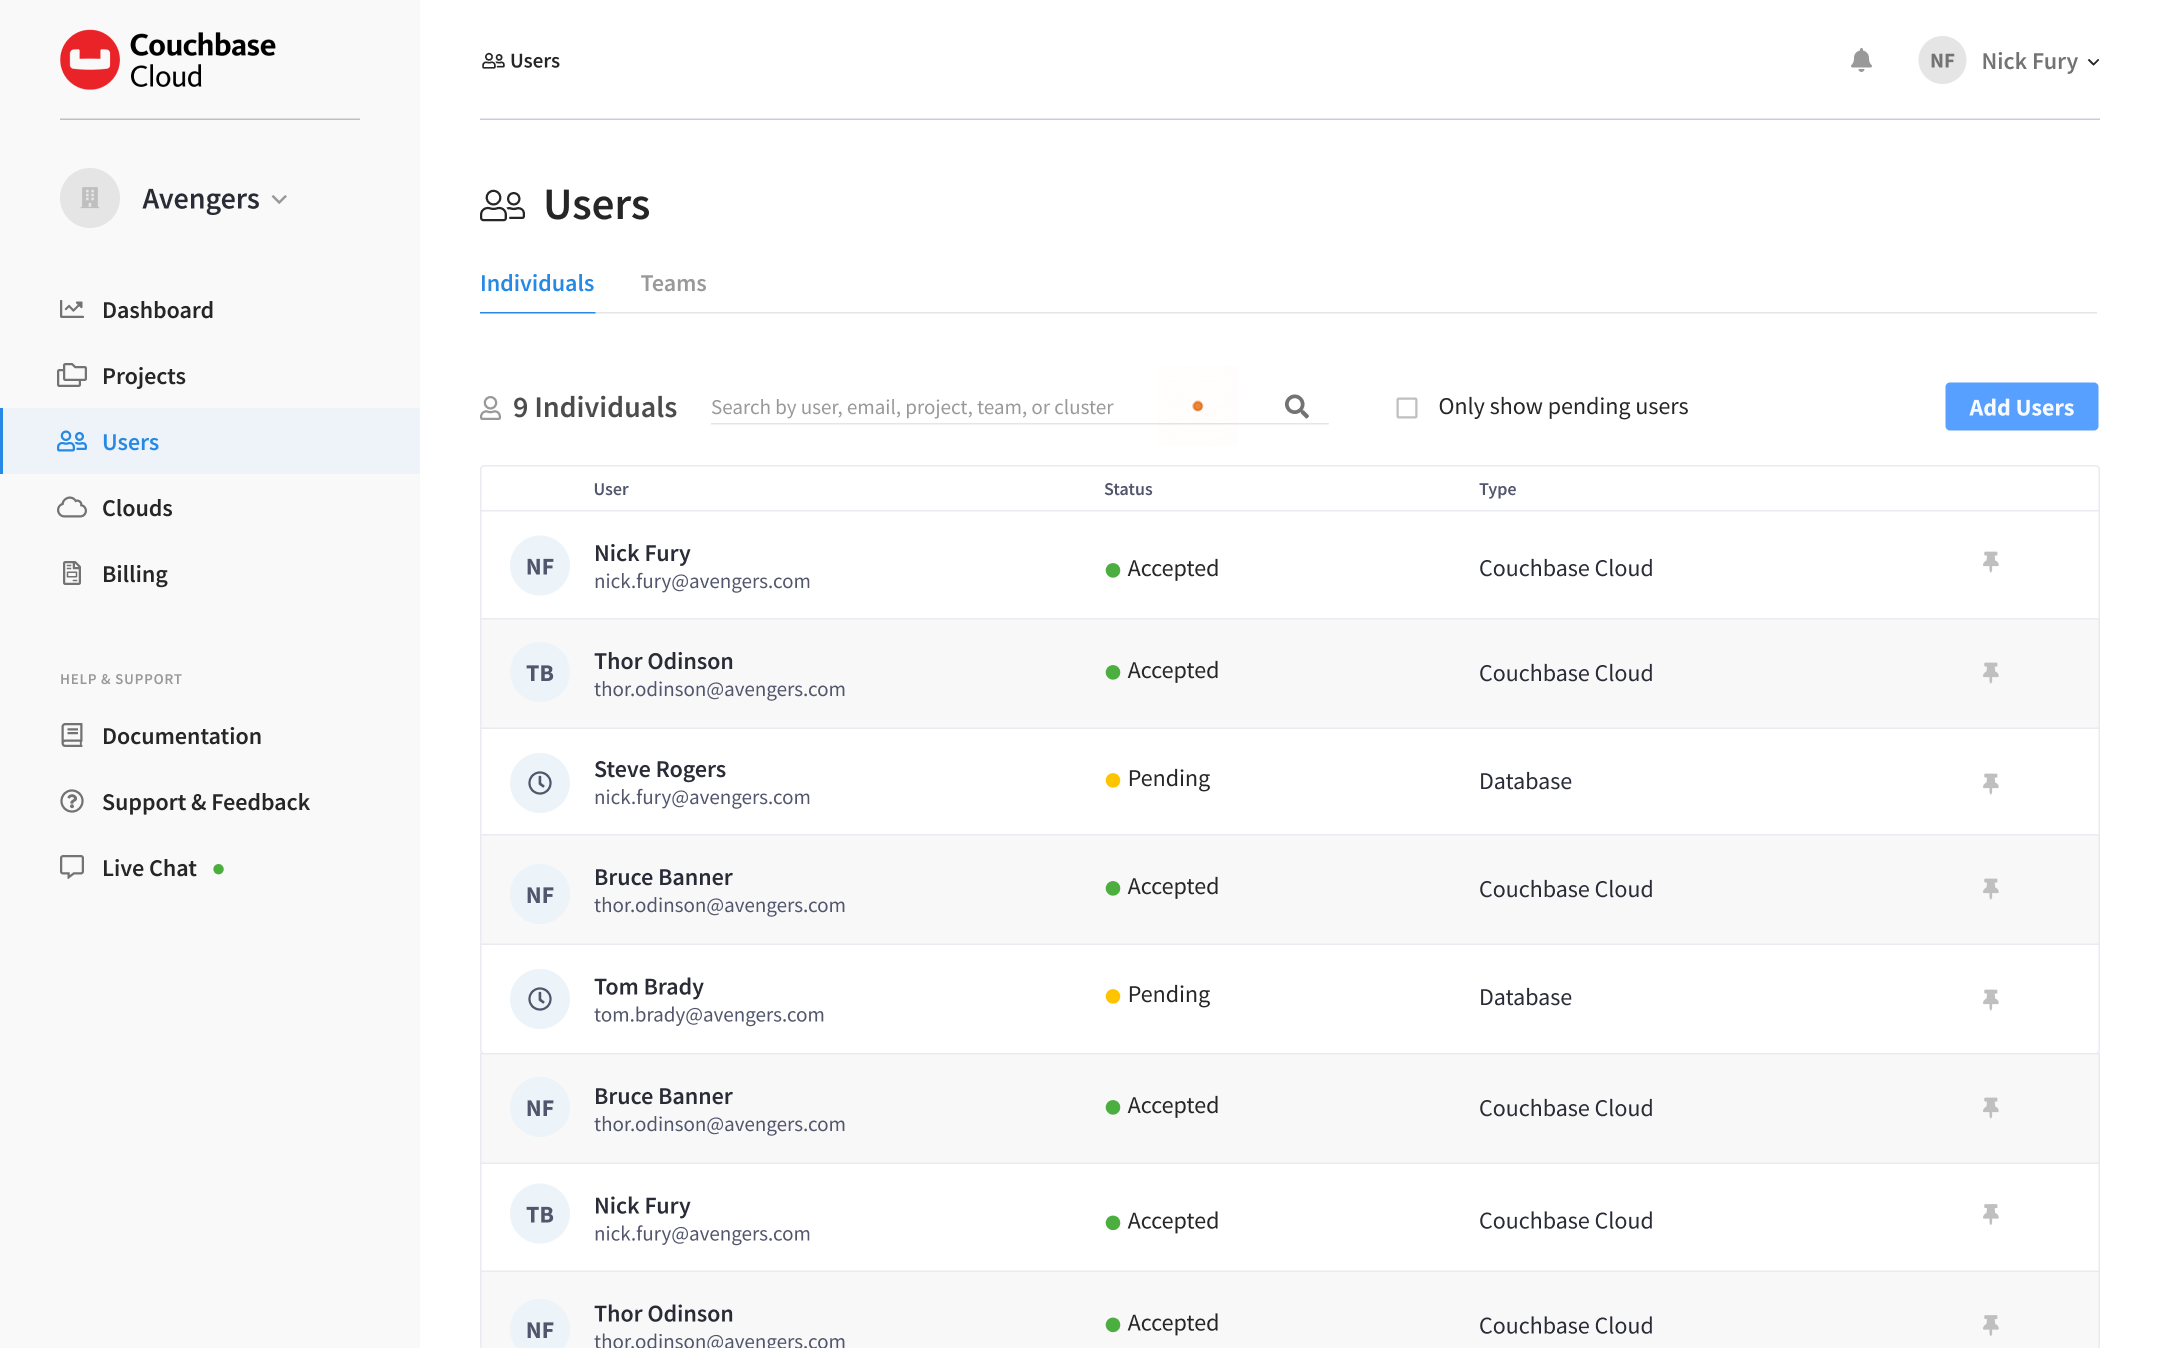
View Active and Pending Users in an Organization
You can view all active and pending users from the Users tab.
Edit a User’s Role in an Organization
Prerequisites
To edit a user’s organization role, you must have Organization Admin privileges.
|
An organization must have at least one user with the |
Procedure
-
Go to the Users tab.
-
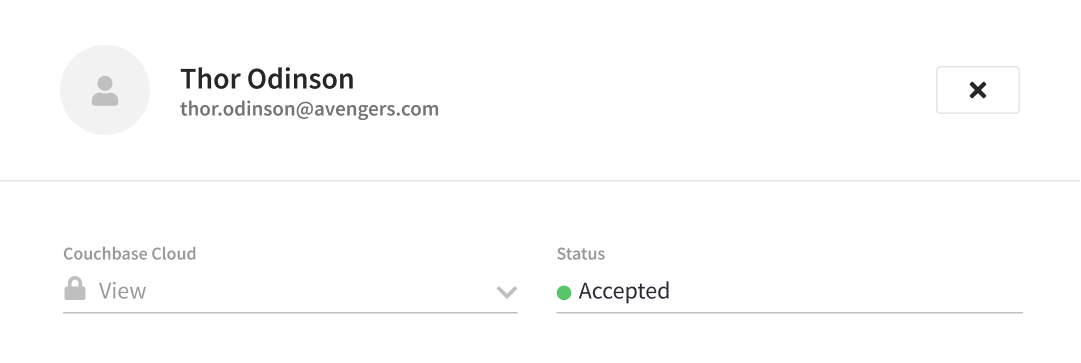
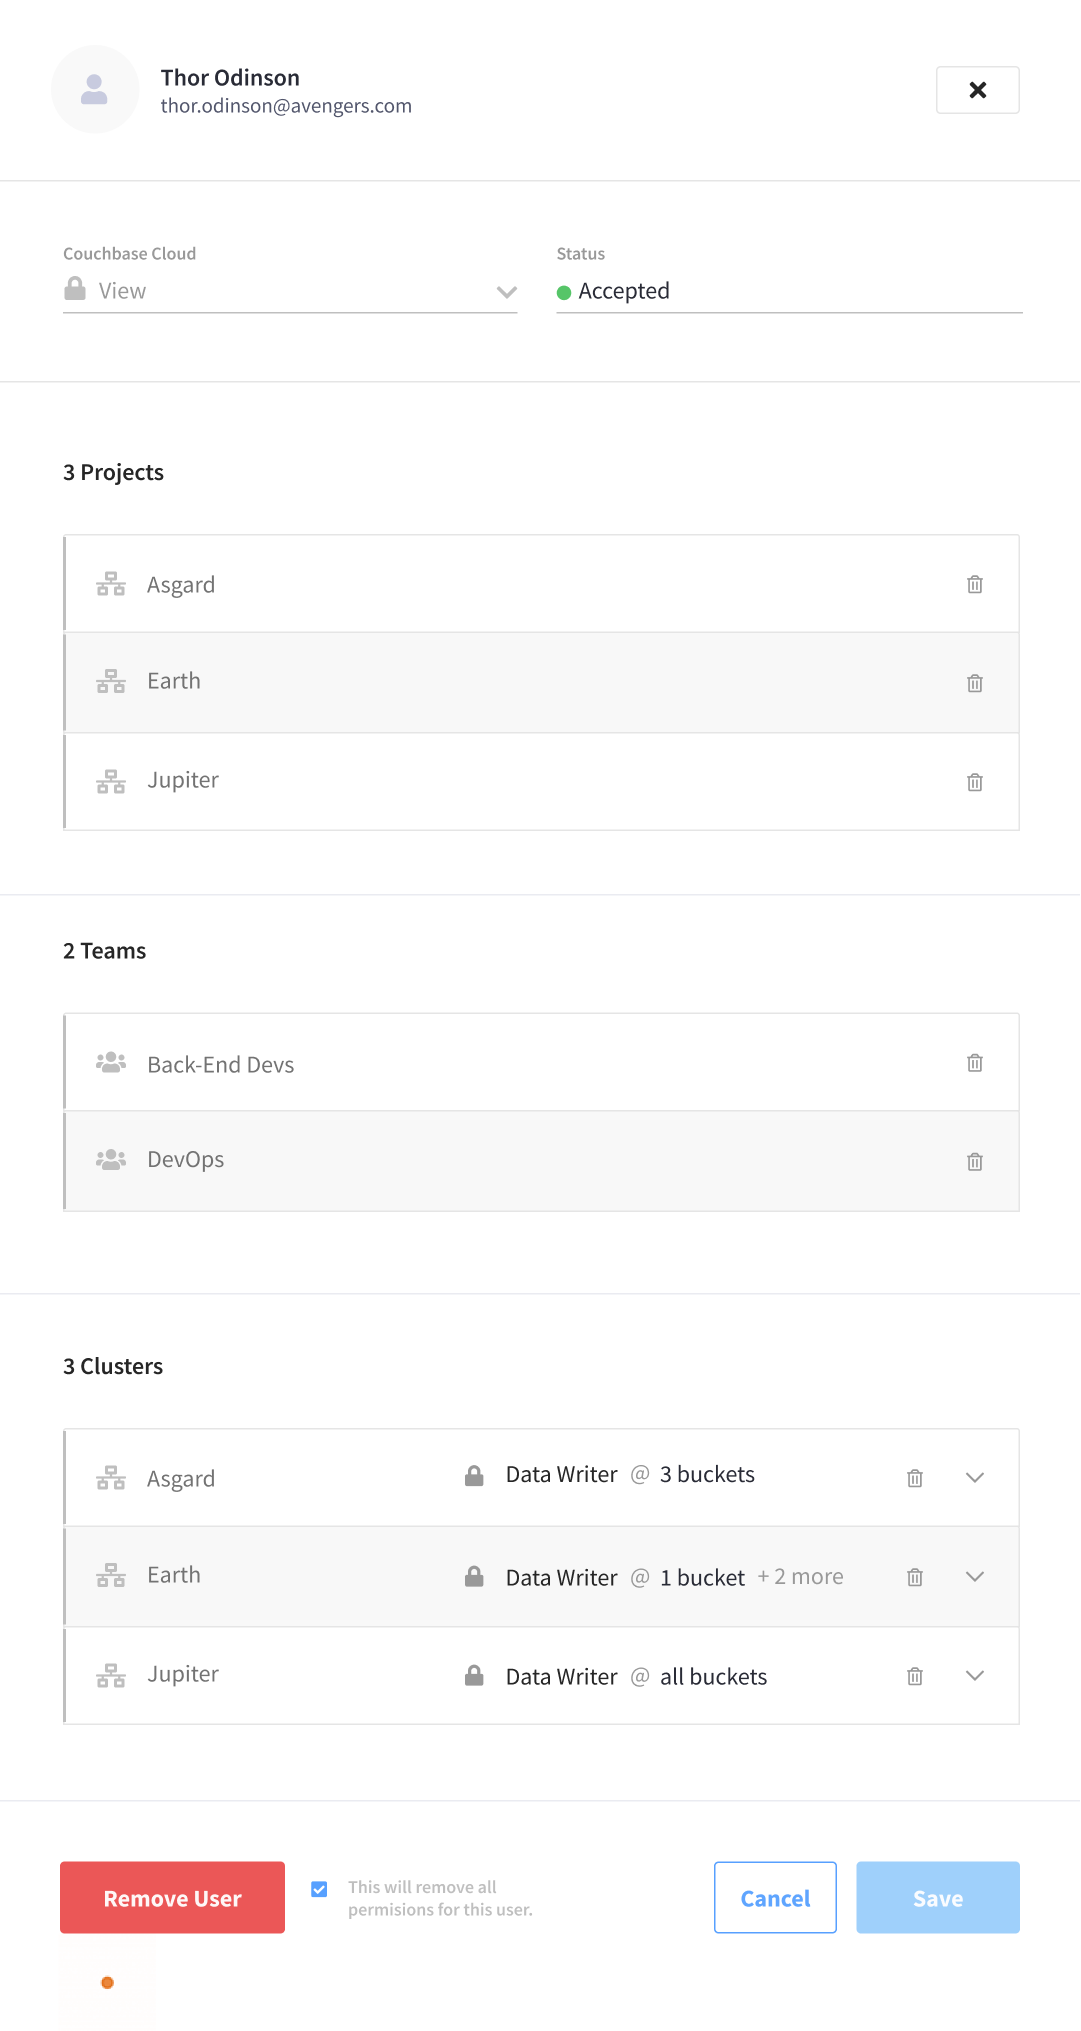
Find the user who’s role you wish to edit, and click on their name to open the user’s slide-out menu. (This can be yourself if you’re editing your own role.)
-
Edit the user’s role.
Click the dropdown menu labeled Couchbase Cloud and select the desired role for the user.
-
Once you’ve selected the desired role, scroll to the bottom of the slide-out menu and click Save.
Remove a User (or Yourself) from an Organization
Use this procedure to remove either yourself, or another user, from an organization.
Prerequisites
To remove another user from an organization, you must have Organization Admin privileges.
|
Only an In addition, an organization must have at least one user with the |
Procedure
-
Go to the Users tab.
-
Find the user that you wish to remove, and click on their name to open the user’s slide-out menu. (This can be yourself if you’re removing yourself from the organization.)
-
Remove the user.
At the bottom of the user’s slide-out menu, find the Remove User button.
-
Check the box labeled This will remove all permissions for this user.
-
Click Remove User.
-
The user will be removed