Connect to Your Cluster
You can connect to a cluster using the Couchbase SDK.
After configuring access to your cluster, you’re ready to connect. There are several ways to connect to your cluster, but this guide specifically covers how to connect using the Couchbase SDK.
Prerequisites
You’ve completed the steps on the Configure Access to Your Cluster page:
-
You’ve established database access on your cluster and copied the username and password credentials from the cluster identity you created. (You’ll use these credentials in the connection script on this page.)
-
You’ve added your IP address to the cluster’s list of allowed IPs.
Download and Install the Couchbase SDK
You can connect to your cluster programmatically using the Couchbase SDK. The examples on this page use the Node.js SDK, but Couchbase Cloud provides pre-populated endpoints and examples to help you connect using any of the other Couchbase SDK languages.
Just make sure that the SDK version you choose is supported with Couchbase Cloud.
Locate the Cluster’s Endpoints and Built-In SDK Examples
-
Go to the cluster’s Settings > General tab.
-
Go to the Clusters tab.
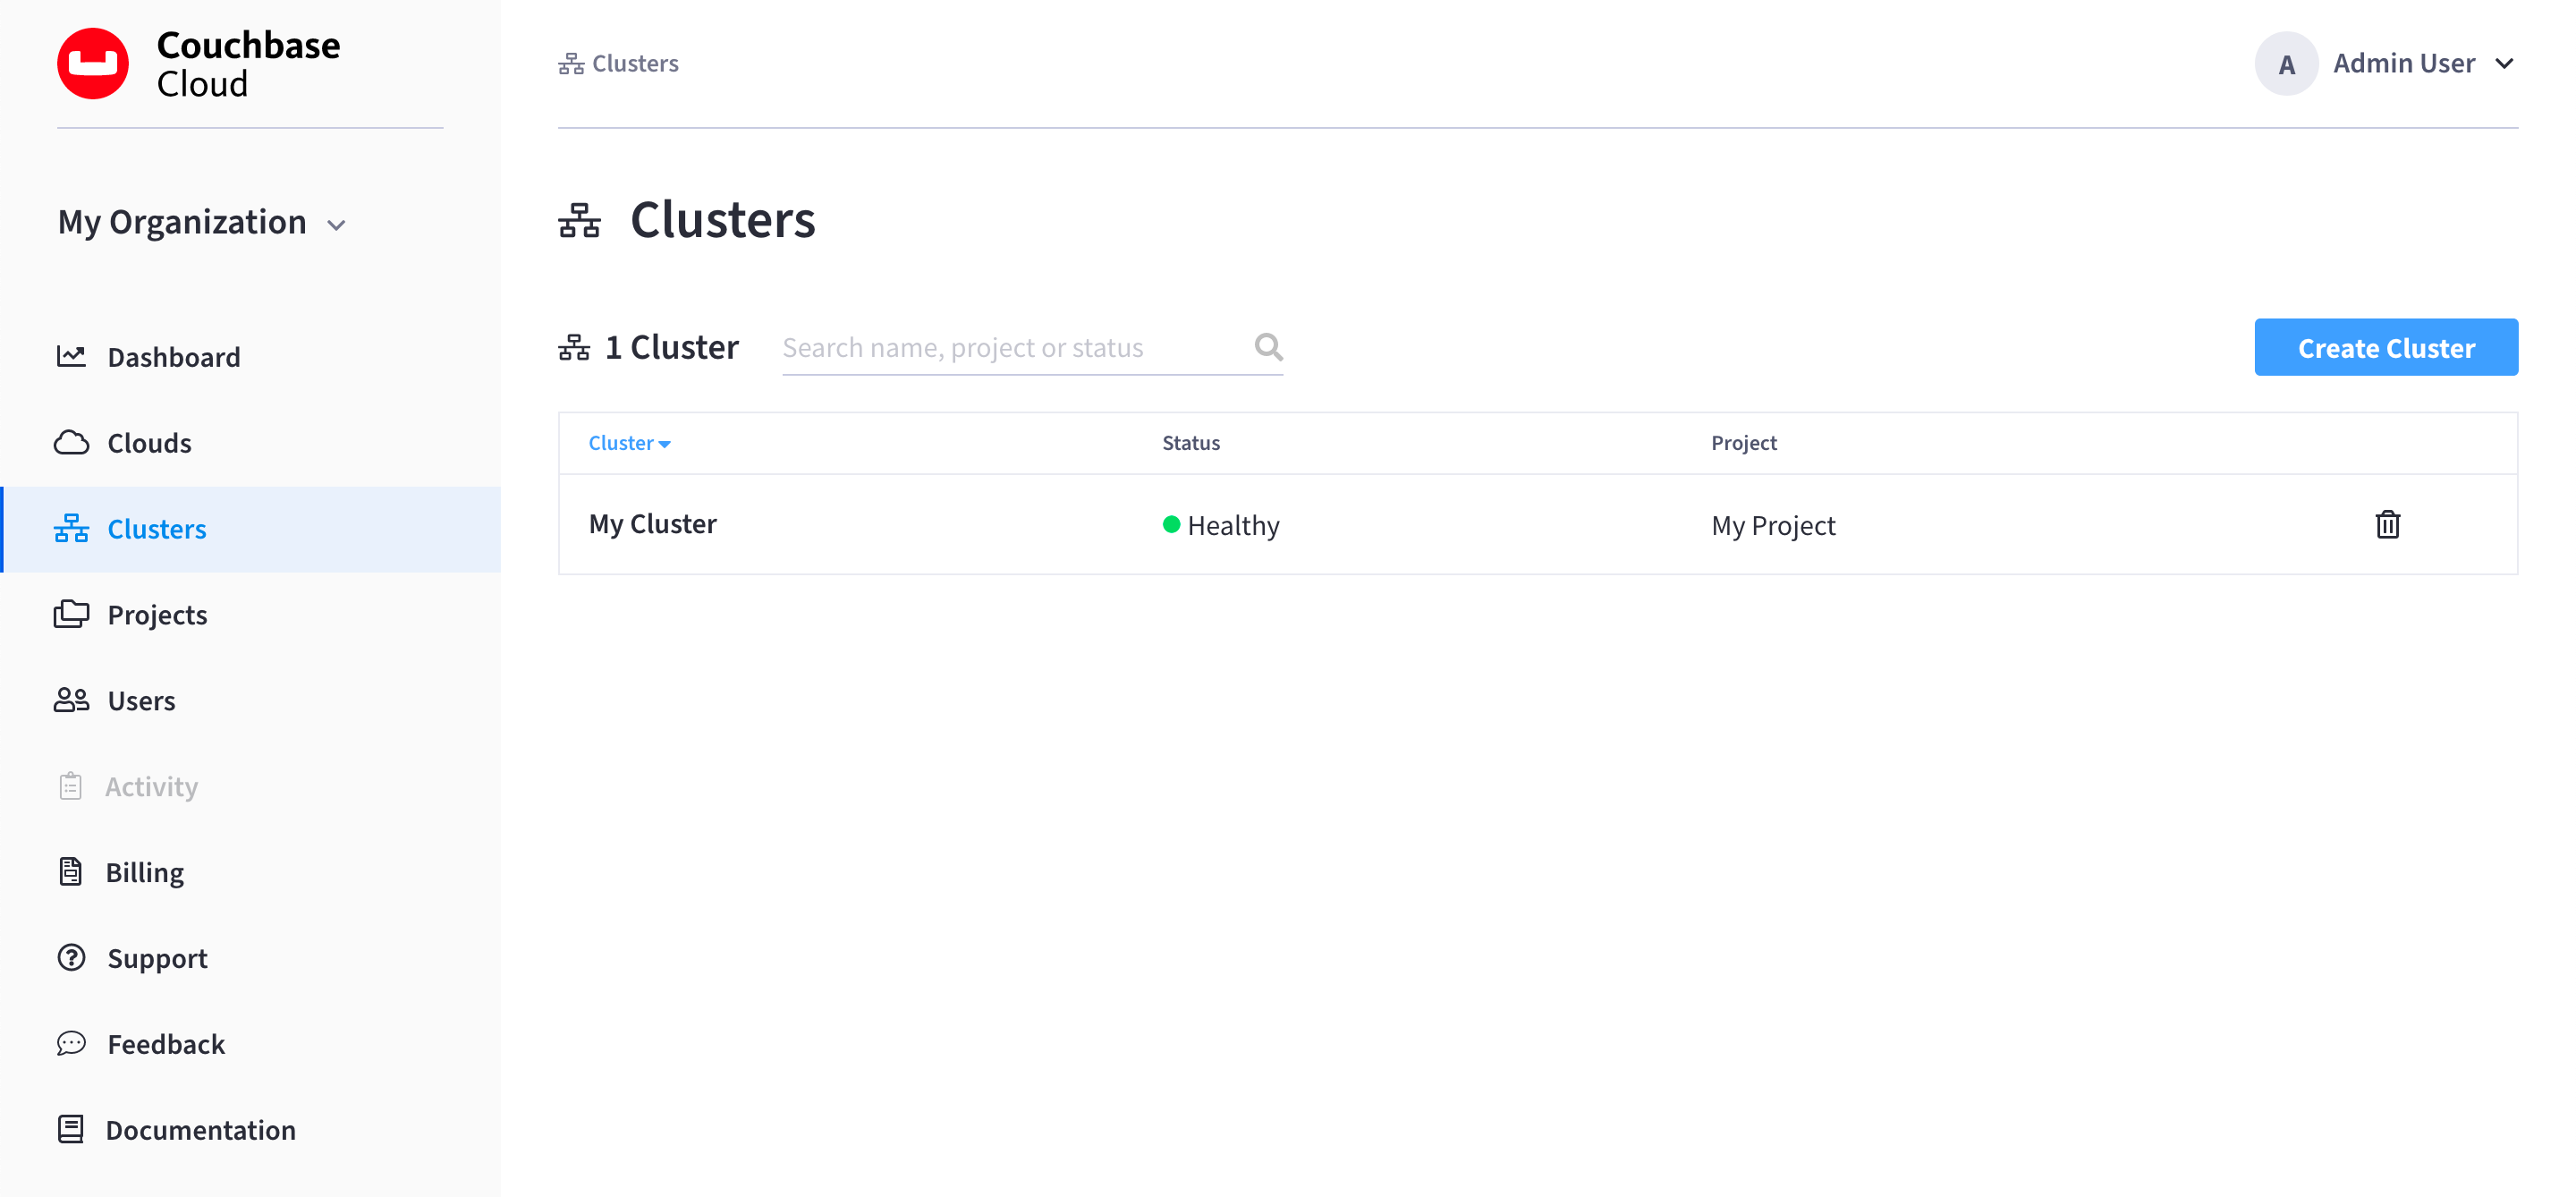
-
Find and click on your cluster.
This opens the cluster’s Overview tab:

-
Go to the Settings > General tab.

Under Your connection, you’ll notice a Public and Private endpoint. These are the endpoints that you will use to connect your applications to the cluster.
-
-
Click View SDK Examples
This opens the Your connection fly-out menu:
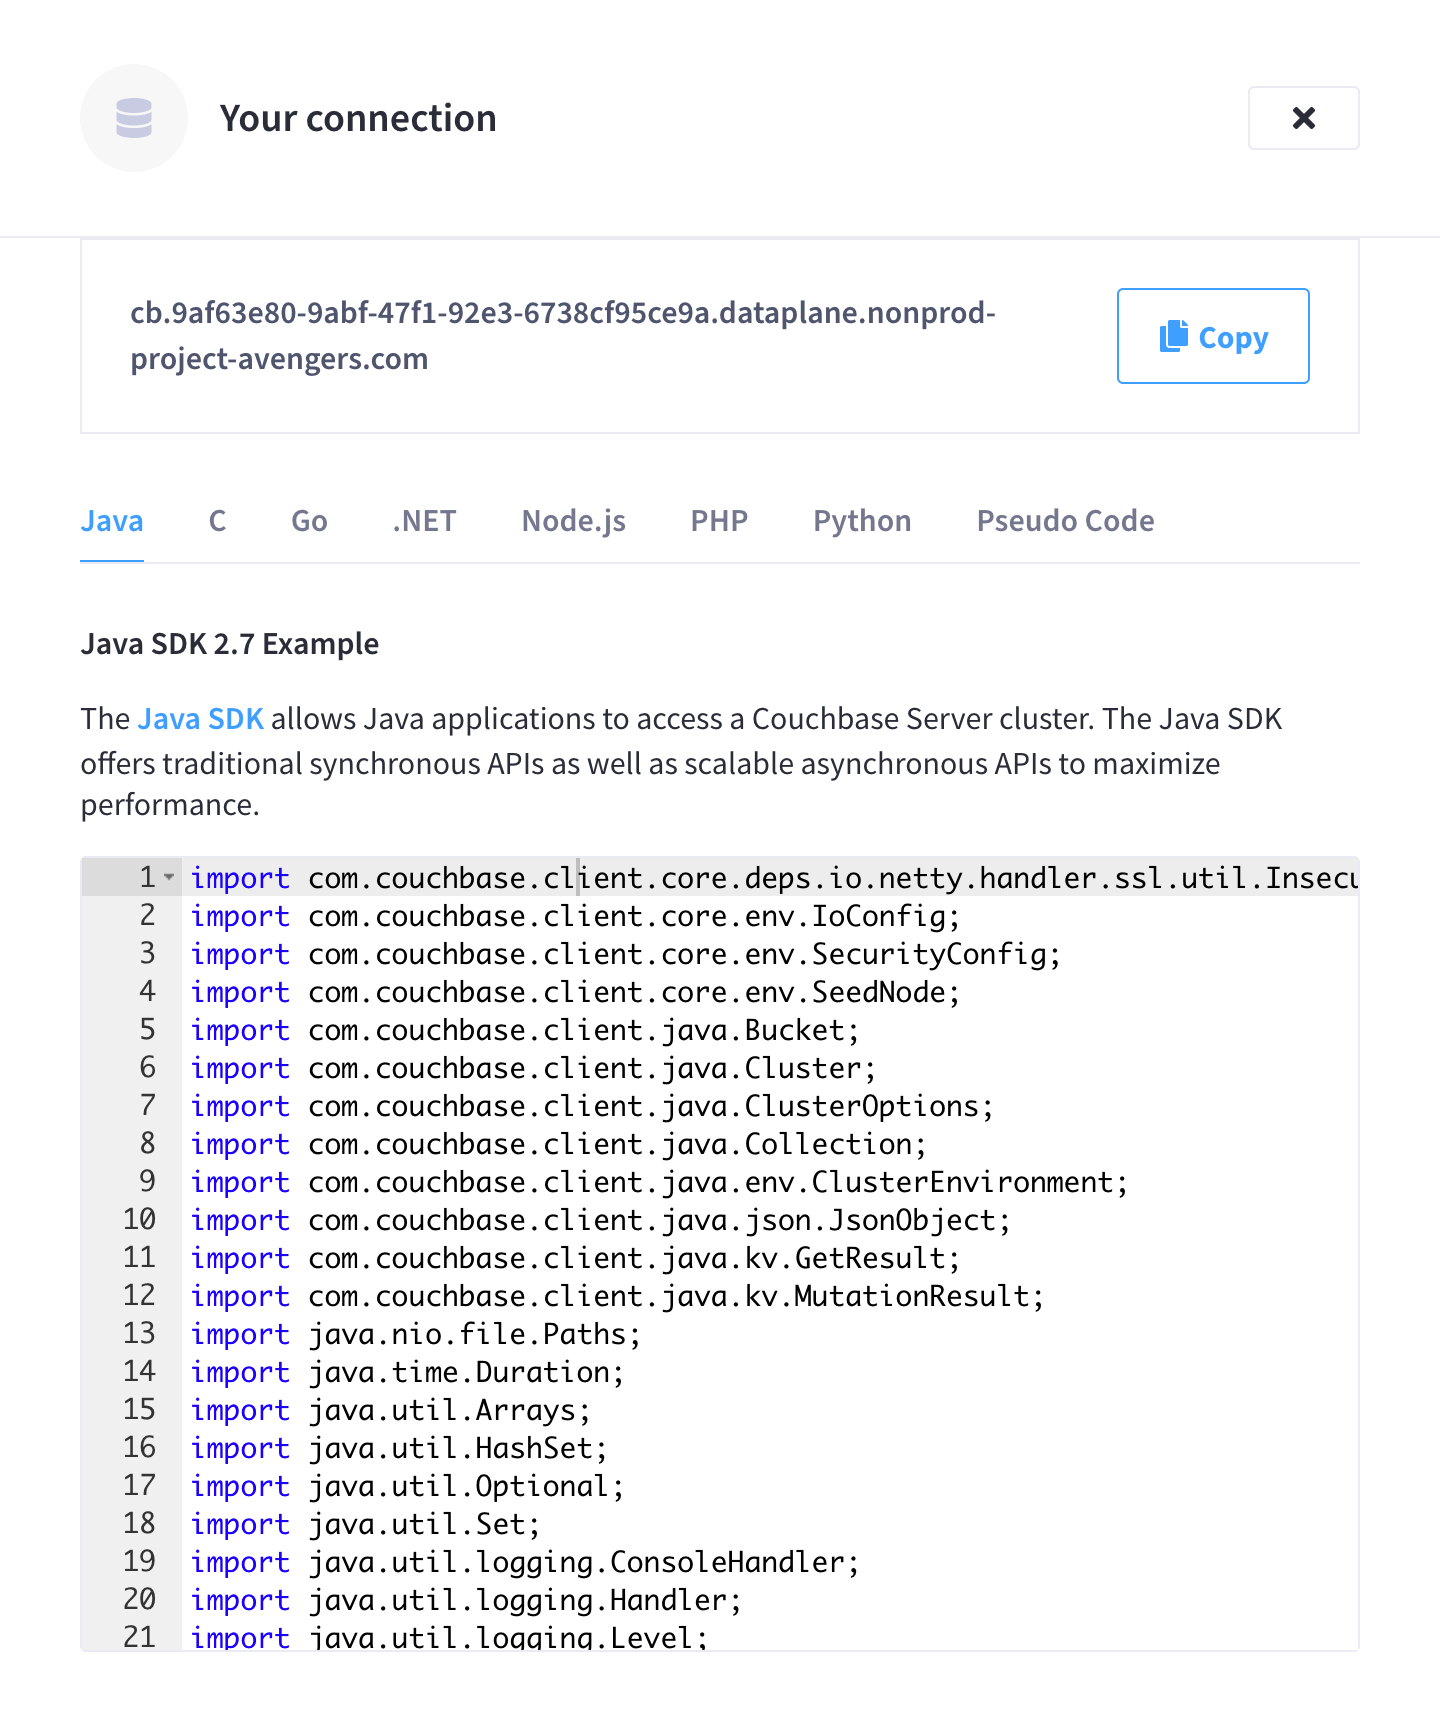
The cluster’s public endpoint is available at the top of the fly-out menu, with several SDK examples that you can browse through in tabular format.
Use an SDK Example to Connect to the Cluster
-
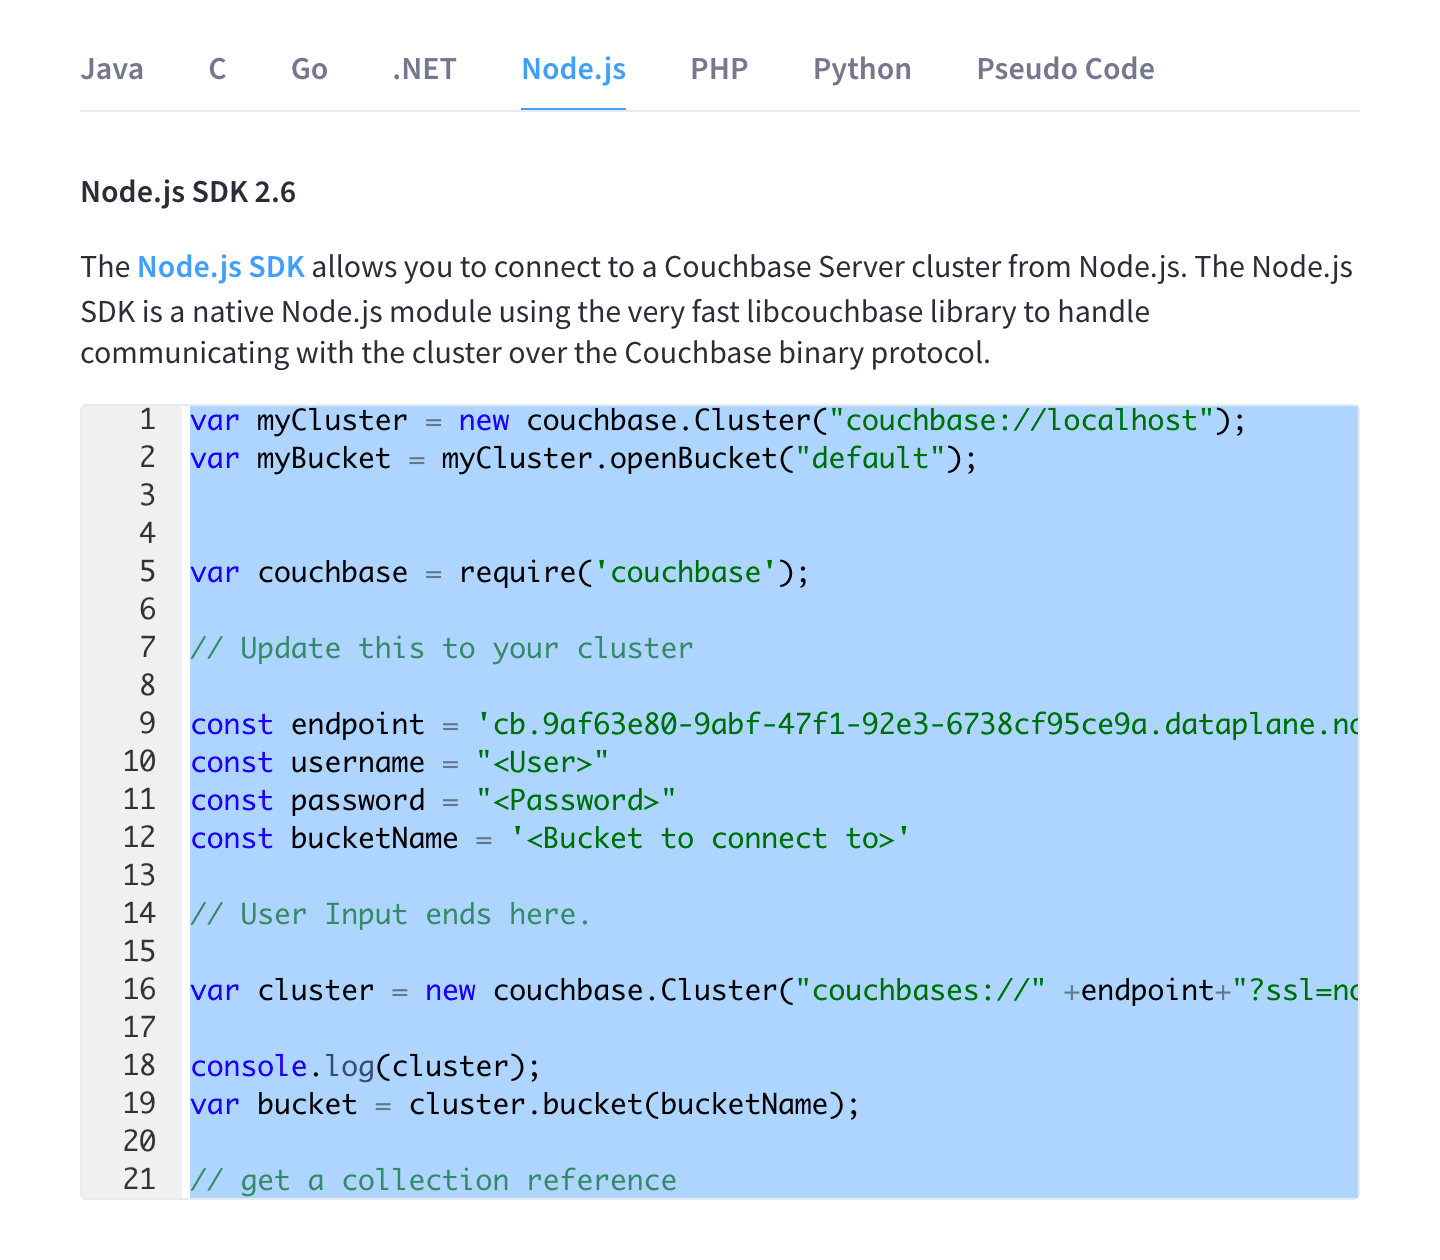
Copy the SDK example code.
From the Your connection fly-out menu, click on the tab for your desired SDK language, and copy the example code.
As an alternative, you can choose to edit the provided code examples directly in the Couchbase Cloud UI and paste the completed configuration into a text editor. -
Paste the code into a text editor and update the connection details.
The SDK examples automatically populate with the public endpoint included. However, you’ll need to configure the following connection details:
-
Username
-
Password
-
Bucket name
The username and password are the credentials that you created in Configure Access to Your Cluster. The bucket name is the name of a bucket on the cluster that you will be connecting to. Although you may not have created a bucket yet, each cluster is configured with a default bucket named
Couchbase_Cloud_Bucketthat you can use to test out your connection to the cluster.Note that the bucket needs to be one which the database user has access to. If you configured the database user to have read/write permissions on all buckets (as recommended), or specifically on
Couchbase_Cloud_Bucket, then you can use the default bucket for testing out your connection.The following is an example of a completed Node.js configuration:
var myCluster = new couchbase.Cluster("couchbase://localhost");
var myBucket = myCluster.openBucket("default");


var couchbase = require('couchbase');

// Update this to your cluster

const endpoint = 'cb.9af63e80-9abf-47f1-92e3-6738cf95ce9a.dp.cloud.couchbase.com'
const username = "cbc.user1"
const password = "P@ssw0rd!"
const bucketName = 'Couchbase_Cloud_Bucket'

// User Input ends here.

var cluster = new couchbase.Cluster("couchbases://" +endpoint+"?ssl=no_verify", {username: username, password: password});

console.log(cluster);
var bucket = cluster.bucket(bucketName);

// get a collection reference
var collection = bucket.defaultCollection();
Once you’ve finished configuring the connection details, save the configuration as a script for your desired SDK language. In the case of Node.js, save it as a
.jsfile. -
-
Run the script.
node connection-script.js -
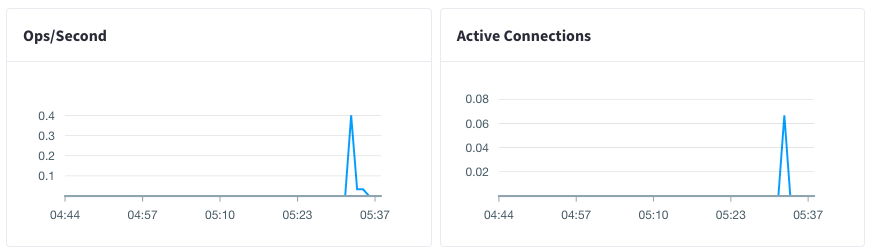
Check the results.
Go back to the cluster’s Overview tab in the Couchbase Cloud UI. You should see activity in the cluster charts.
Next Steps
Now that you’ve established that you can connect to your cluster, the next step is to Insert and Interact with Data in Your Cluster.